Viper: Canopy and primer

Posted November 13th, 2011 by Devin and filed in Colonial Viper MKII, Modeling

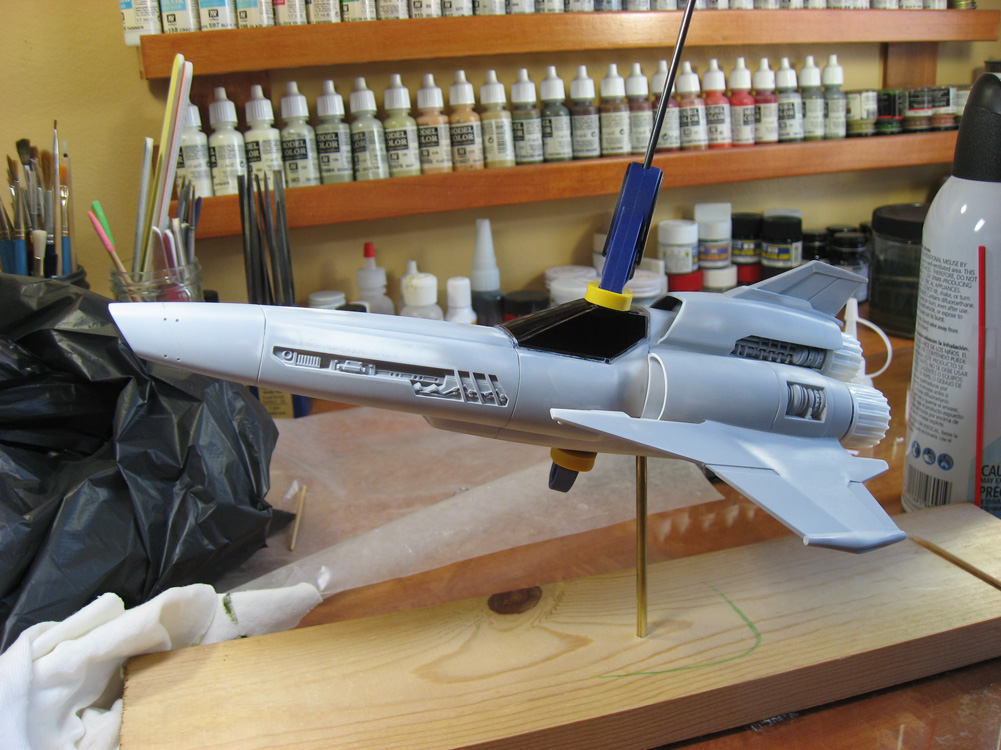
Starting to get close to paint time!  One of the last major components to go on was the canopy (the guns are all that are left to go on, but they will be the last thing done, after final painting and weathering are finished).  The canopy had some fit issues.  The instrument panel sat a bit proud of the cockpit sill in the front, keeping the canopy from sitting level.  After several sessions with a super fine file and attention to the top of the panel, I was able to get the canopy flush.  Just to make sure it was all snugged up, while the glue set up, I clamped it from the top, but very carefully.  Clear styrene is much more brittle than the other varieties, and the last thing I wanted to do was crack this transparency.

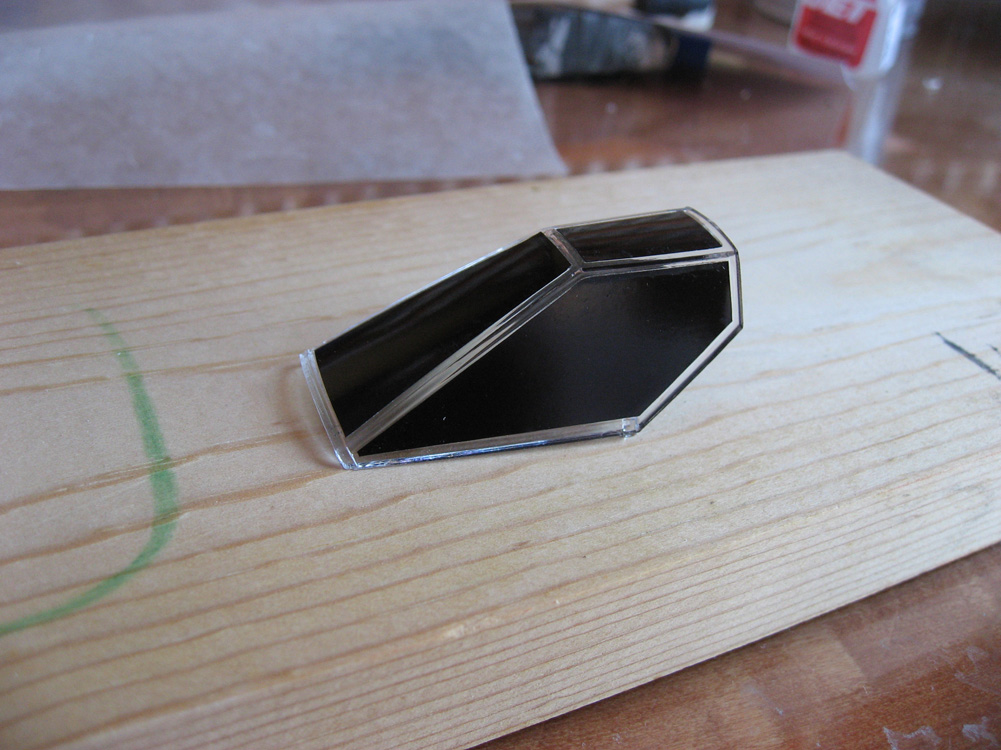
The black vinyl masks are from Aztek Dummy and specifically for this kit; the set also includes masks for painting the red stripes and markings, which I’ll do instead of using the kit decals.  They pulled from the backing fine and laid down pretty well.  I had to do some burnishing around the inner canopy frames to get them to completely adhere.

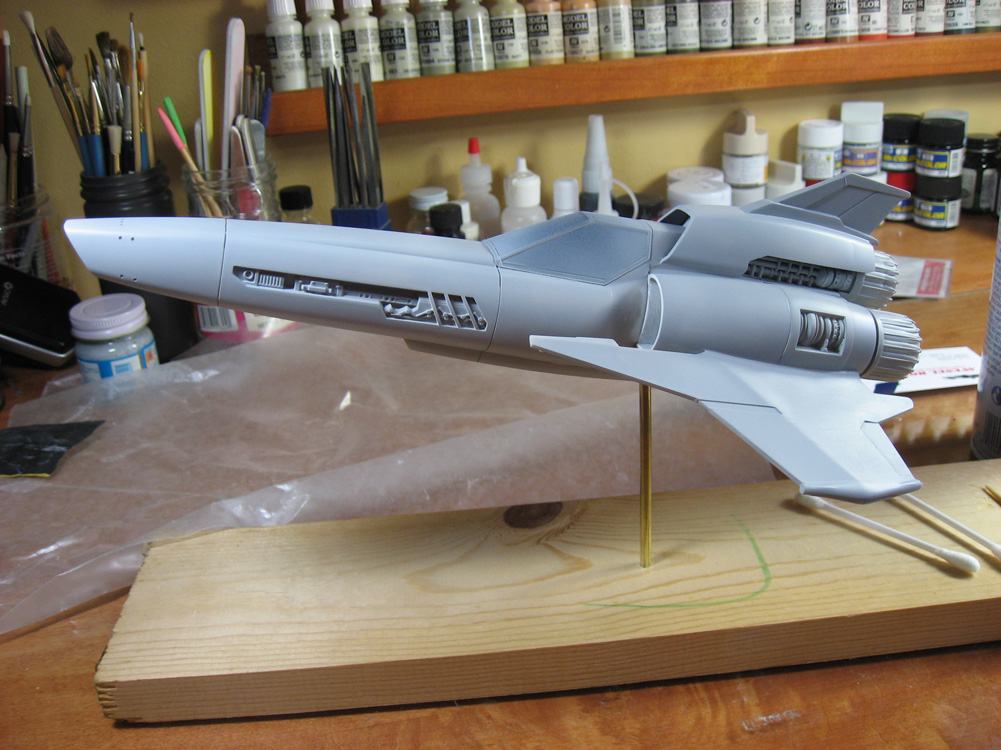
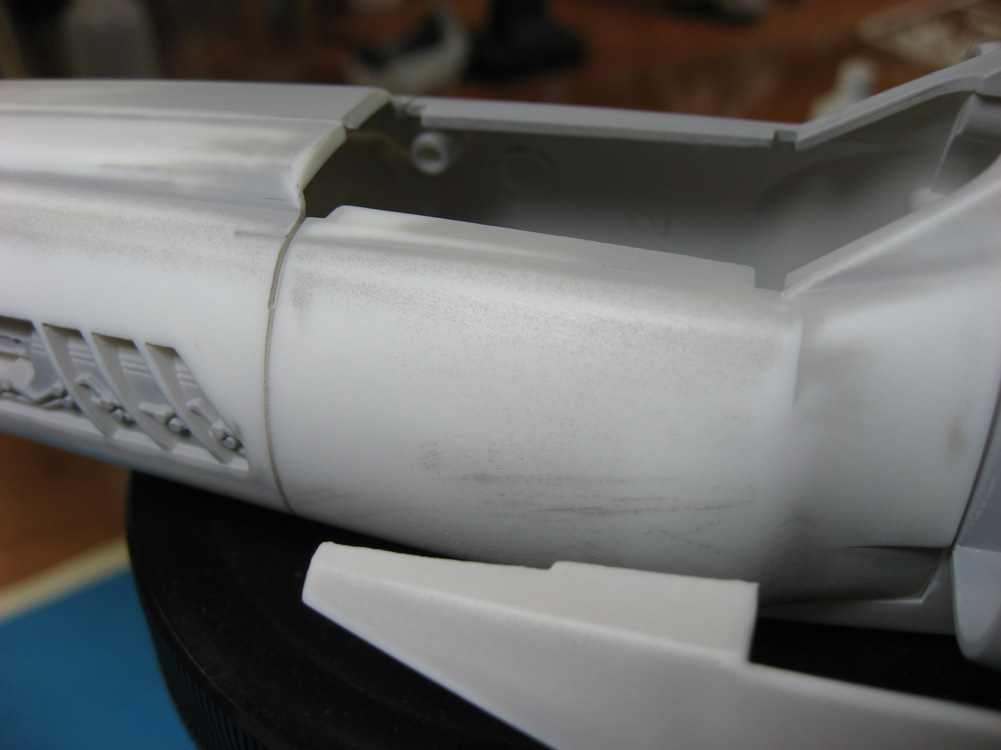
The final photo is of the Viper in overall primer gray.  There are a few spots that need touched-up and polished out, and once that’s done it’s time for a little pre-shading and then the overall white coat.

Viper: Cockpit, Again.

Posted October 16th, 2011 by Devin and filed in Colonial Viper MKII, Modeling

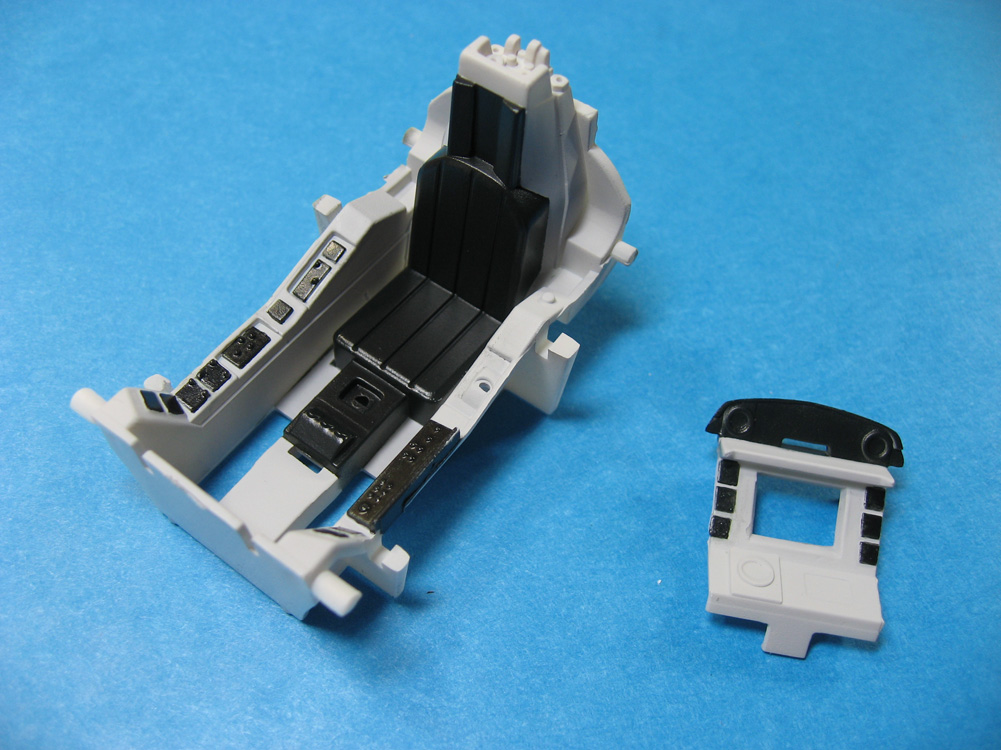
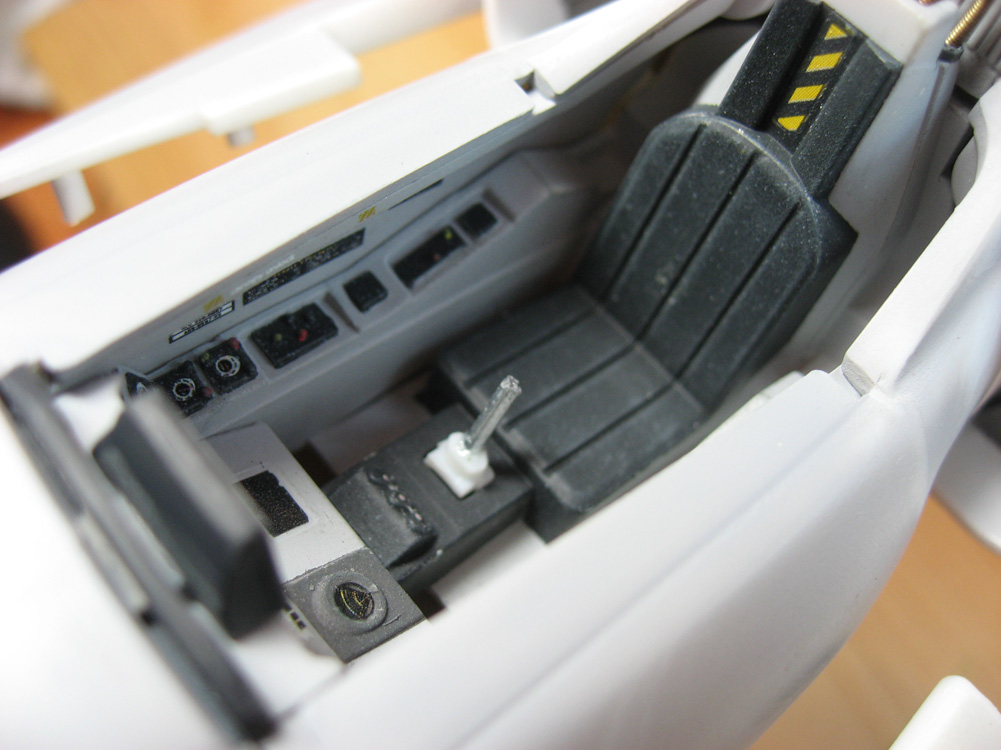
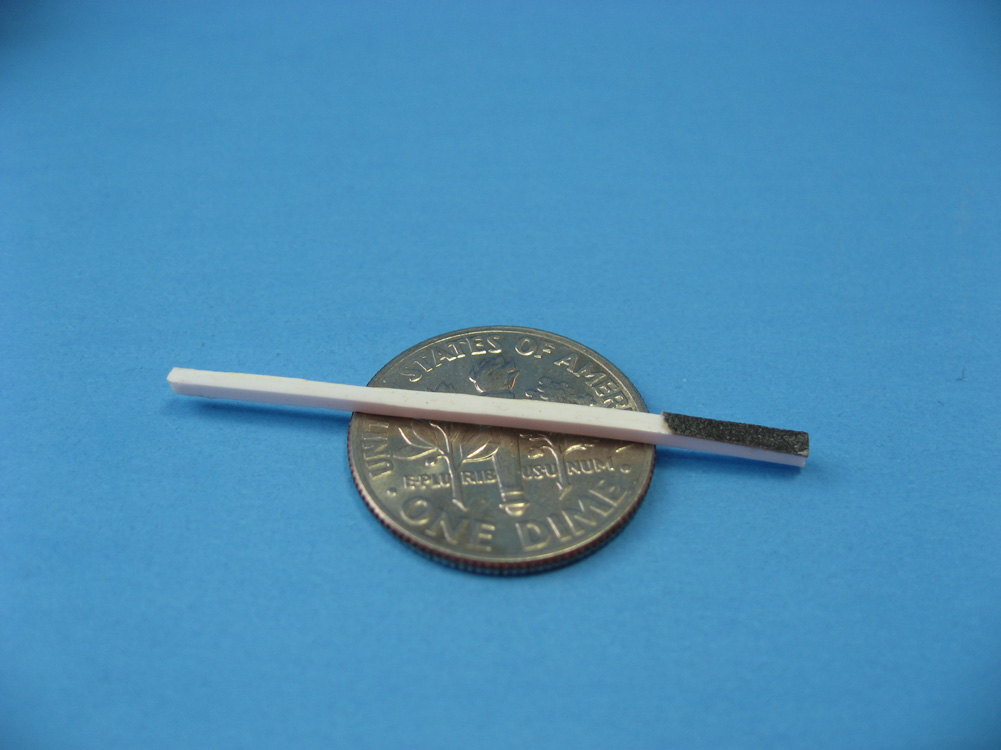
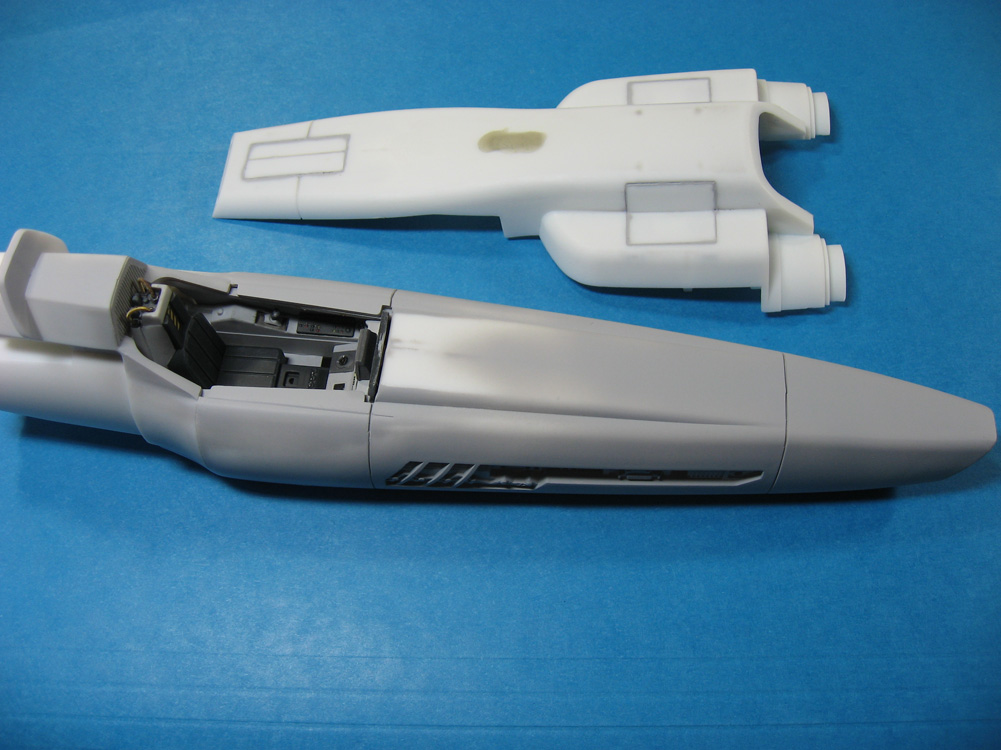
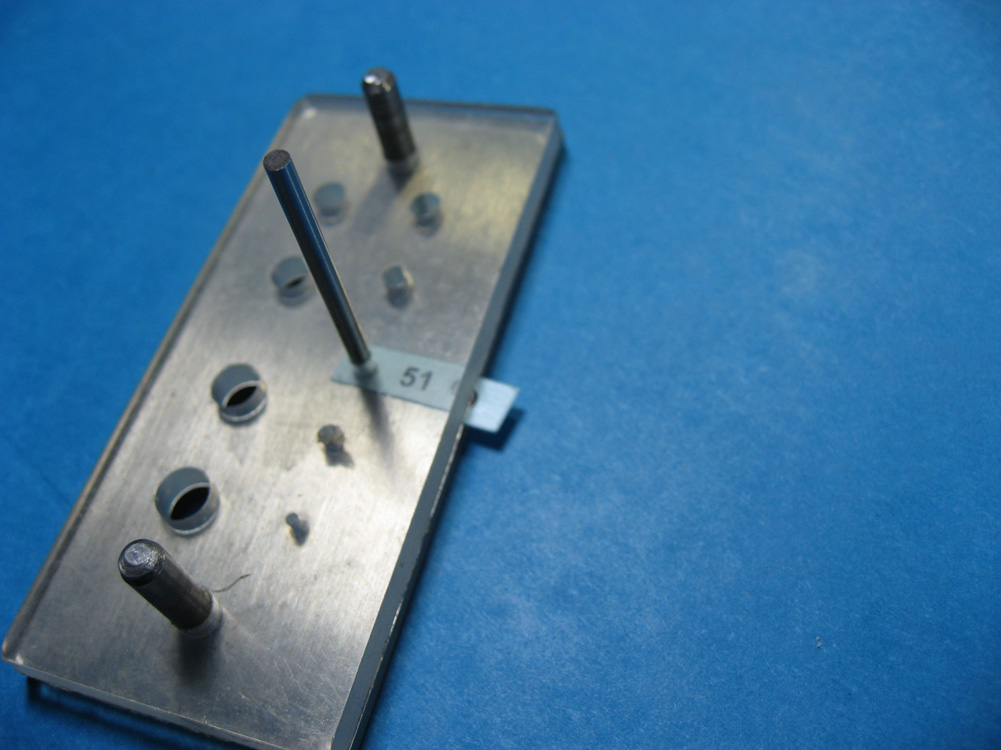
I’m reasonably sure that the fuselage is now ready for final primer and paint.  That means that I have to get the canopy on and smoothed into the fuselage (it has gaps, of course), and to do that our pilot has to go in first.  The kit instructions say if using the pilot, you are to cut off the top of the control stick and glue that to the bottom of the control stick already molded into the pilot’s hand.  As you can see from the first photo, they don’t even come close to meeting up.  Had I known of this issue before putting the cockpit into the fuselage, I would have built up the center console so that it looked right, but at this stage all I could do was drill out the base of the stick and put in a piece of wire to make up the difference.

The pilot didn’t quite want to fit.  Wide hips, narrow seat.  With a little pressure, though, it worked.   I broke out the super glue, a bar clamp, and repeated over and over as I tightened the clamp “please don’t snap his neck, please don’t snap his neck…”

The final piece is a custom tool I made for the build.  1mm square styrene stock with strips of 200 grit sandpaper glued to it.  For the small recesses at the top of the engines and around the seat of the thrusters, this is all that would fit in there.

Next up: put on the canopy and start masking for primer and paint.

Viper: Thrusters

Posted September 21st, 2011 by Devin and filed in Colonial Viper MKII, Modeling

After several weeks of on and off again sanding and filling, I’ve got the wing and stabilizer roots blended into the fuselage.  It was a long and arduous process.  Let us never speak of it again.

With that done I felt that I could add the thruster assembly.  As with everything else on this kit, there were gaps, but by using the clamps as shown, I was able to pull it all in tight.  A healthy slathering of liquid cement assures that they’re never going anywhere.

Once these dry a full day, at least, then I need to drill the mounting hole in the bottom of the fuselage, and also decide if the canopy will go on before or after the painting process.  Before would make it a lot easier, but it depends on how well it fist.  I haven’t had the heart to try it yet.

Viper: Wings!

Posted August 21st, 2011 by Devin and filed in Colonial Viper MKII, Modeling

Only one photo for this update.  I’m at that stage where a lot of work gets done and very little of it is visible to anyone but the one doing it: paint prep.  I was pleasantly surprised that the wings went on and the alignment was perfect.  The problem I ran into, though, is that there was a substantial gap between the wings and the fuselage on both sides, and between the vertical stabilizer and the fuselage.  Now I’m going through the ritual of filling with putty, shaping, sanding, priming, finding what didn’t turn out perfect, and then repeating the entire process until everything is smooth and ready for paint.  I figure with this kit it’ll take me the better part of a week.  I hope to have a full base-coat of primer on by next weekend.

Viper: Assembly Continues

Posted June 22nd, 2011 by Devin and filed in Colonial Viper MKII, Modeling

After weeks of fitting, refitting, and fitting yet again, I finally got up the courage to glue the aft fuselage together.  The instructions and the kit layout call for the wings and tail to be included in this step, but with the gaps I have, I opted to leave them off for now and deal with the seams first.  I’ve read of some having problems with gaps in this area of the kit, and others saying that it snapped together like Legos.  I’m obviously in the former camp.  I have no idea if this is something I did wrong, or if it’s a problem with the kit.  Regardless, I have some filling to do.  The major gap I have actually been able to close up a bit by clamping the starboard engine front to back and slathering it with liquid cement.  We’ll see if that holds.  Everything else will get healthy doses of Apoxie Sculpt to fill.

Two other things in this update: I’ve got the upper engine painted (in this photo it has only been base coated in black and then sprayed in dark gray) and drilled for extra piping.  Also, as the photo shows, the thrusters have cut-outs in them.  Unfortunately that would allow you to look into a hollow cockpit.  I punched out some styrene disks and inserted them, blocking the view and any stray light (they have yet to be painted in this photo).

Viper: Drilling RCS Thrusters

Posted April 23rd, 2011 by Devin and filed in Colonial Viper MKII, Modeling

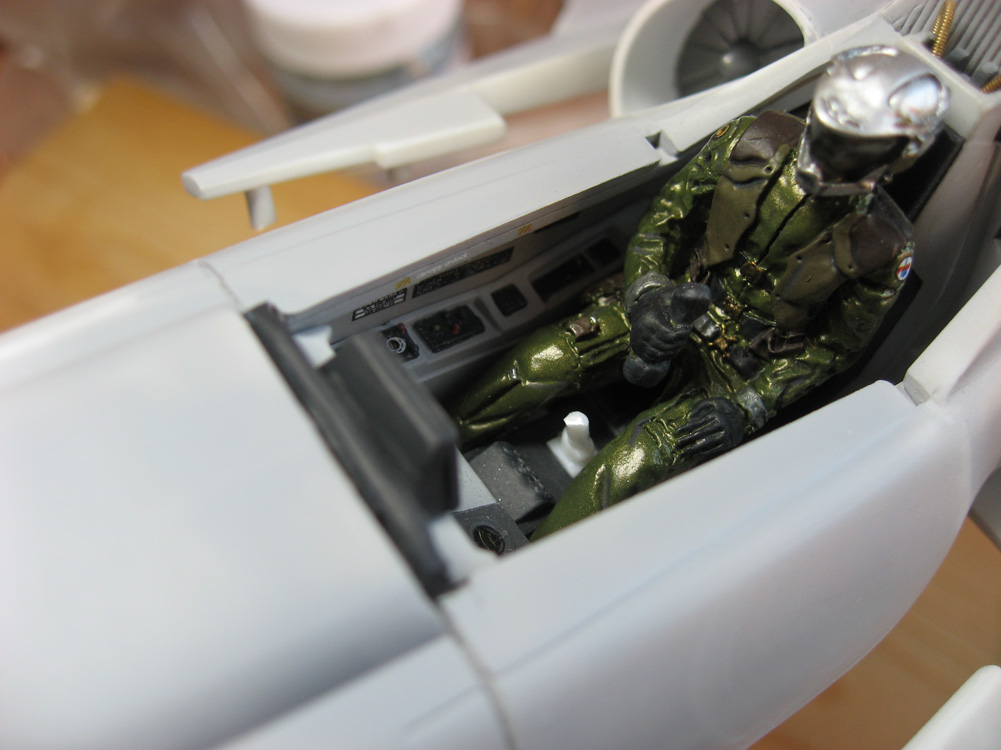
Long time no post.  A trip out of town, a busy month at work, and the worst cold and subsequent respiratory virus I’ve had in years has kept me away from modeling.  This is the first weekend in over a month that I’ve actually sat down to do some building.  So, on with it…

The Vipers in the Battlestar Galactica universe have multiple RCS (reaction control system) thrusters throughout the airframe.  These are the same types of mini-rocket thruster nozzles that the Space Shuttle and indeed any other real-world spacecraft use to maneuver in the vacuum of space.  The kit comes with decals to depict these, but I want a little more 3-D realism, so I’m drilling them.  The first photo shows the tape that I’m using to lay out all of the lines that the RCS fall upon so that I can get everything nice and straight.  I have the first three drilled into the top of the nose, and I had to do them three times before I got them to my liking.

The next photo is of the lower part of the fuselage.  As with most models that give you an in-flight or landing gear option, if you close up the gear doors, they don’t fit too well.  Much filling and scribing has been done to get them to this point.  If I do another of these models with the gear up, I’ll simply block off the openings with sheet styrene and rescribe all of the joint lines freehand.

The final photo is the top engine.  It’s a separate piece, so it gets painted before assembly.  This is simply the gloss black primer, prepping for the application of some metallic paints and wiring details.

Viper: More sanding and some masking

Posted March 7th, 2011 by Devin and filed in Colonial Viper MKII, Modeling

After a week away at an awesome writing retreat, and then returning to a 9-5 gig last week, the modeling time has been limited, but I still have made some progress.

The engine intakes for the Viper are a separate assembly just behind the cockpit.  The kit instructions would have you install them before painting, but there is no way I’d be able to maintain my sanity and mask these things with the fuselage getting in the way.  Therefore, this assembly has been primed and shot with gloss white.  I used strips of tape cut to about an 1/8 to 1/4 of an inch in length to mask the interior, following the jagged edge of the louvers.  I’ll then shoot the metallic color on the intake louvers (they actually almost look like fan blades, but that doesn’t make any sense with the geometry of the housing; like Sci-Fi is supposed to make sense!), and then strip all of the masking and mask off this entire assembly and attach it to the fuselage.

Priming and sanding also continues on the main fuselage.  Holy cripes does this kit have a rough finish.  Every surface has a rough texture, the cut-outs along the fuselage side have craters running along them that shouldn’t be there, and there are just odd plastic protrusions and dips everywhere you look.  Clean-up is turning out to be as much of a chore as a resin kit would be.  But, it’s better than no kit at all, and it’ll clean up nicely in the end.

Viper: Pilot and Inital Assembly

Posted February 23rd, 2011 by Devin and filed in Colonial Viper MKII, Modeling

A few photos before I take a break.  It’s time for the yearly Altered Fluid Writer’s Retreat, so I’ll be sequestered in a house in Connecticut for the next 5 days with nothing to do but write.

The pilot in the kit is a decently cast resin figure.  There’s a little clean-up needed, but no major mold lines, so it didn’t take long to prep the piece.  The flight suits in Battlestar are this funky metallic green color, for which there exists no store-bought match.  I pulled out a few bottles of Vallejo acrylic that I thought looked close, and started mixing on my test pallet.  Six tries later I had a good result (and only 5 failed attempts is pretty good).

The colors:
Russian Green (894), 3 parts
Medium Olive (850), 2 parts
Bronze (998), 2 parts

It looks great in person, very close to the on-screen appearance, but in the photos the metallic doesn’t show up very well.  Further work needs to be done on the figure, such as shading and highlighting, applying the flight patch decals, dullcoating, and hopefully I can find some way to replicate the insignia on the top of the helmet.

As I continue to work on the pilot, I started major assembly.   Fuselage halves are glued together, with the cockpit sandwiched inside.  In order to avoid problems with seams, I started at the nose and worked back, gluing and clamping, waiting, then moving further back.  The fuselage just forward of the cockpit was an odd angle that wouldn’t accept clamps, so I glued it and watched The Colbert Report while I held the pieces together.

One new detail in the cockpit are the oxygen hoses at the rear of the seat.  Made from old guitar string.

Viper: Cockpit, Pt. 2

Posted February 19th, 2011 by Devin and filed in Colonial Viper MKII, Modeling

With the wind ripping out of the west today so hard that I’m not sure how parts of our building haven’t sailed off into the Hudson, there was no way I could set up the airbrush booth to do any spray painting.  So, I’ll take the chance to update the blog.

The finishing touches of the cockpit are the decals.  The dials are tiny, minuscule, and any other word you can think of that means “Holy crap, how am I supposed to work with that?”  I used a micro punch set to punch out the round dial faces from the sheet.  Much easier to get them to sit where they should on the instrument panel without excess carrier film to worry about.  The finished cockpit shot shows everything decaled, flat-coated, weathered (minimal), and the instrument and display faces gloss-coated to give it that under-glass look.  I have not yet attached the cockpit sidewalls, as I want some wiggle and adjustment room when it comes time to put the assembly in the fuselage.

The other photo is of the fuselage, port side.  A coat of primer has been shot, and mostly sanded away.  Evident in the photo is the rough, sandy texture of the plastic, and heavy scratches under the cockpit.  I’ve spoken with others who have built this kit and they all report the texture all over, and those scratches in the exact same location.  It looks like polishing the molds wasn’t a high priority before the kit was put into production.

Up next: Pilot figure and starting fuselage assembly.

Viper: Cockpit

Posted February 13th, 2011 by Devin and filed in Colonial Viper MKII, Modeling

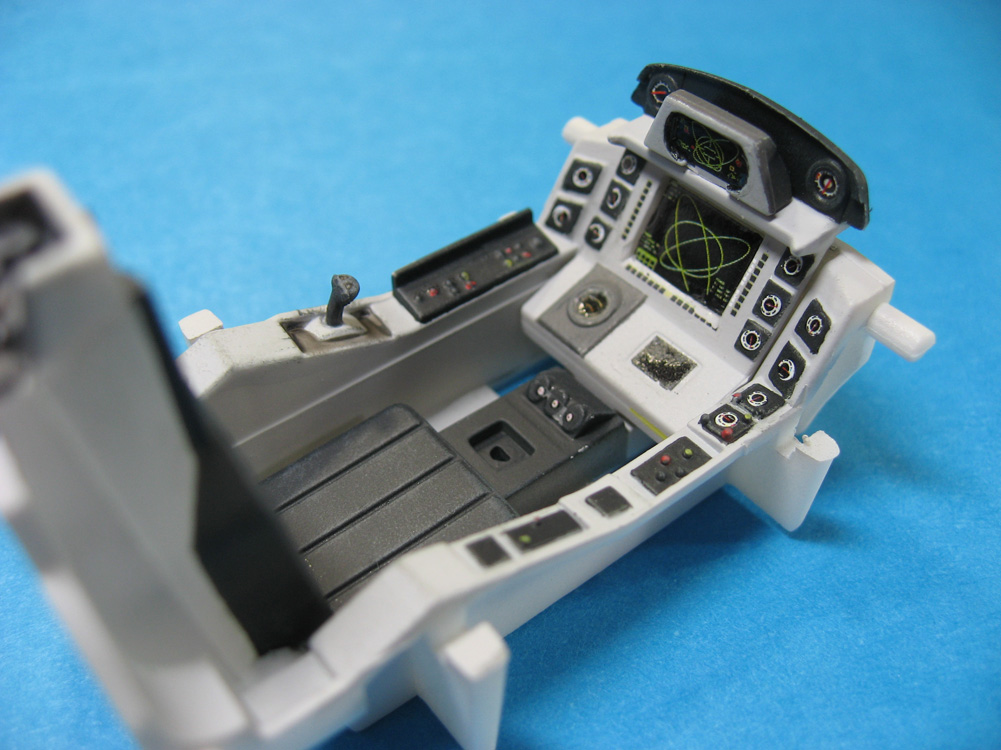
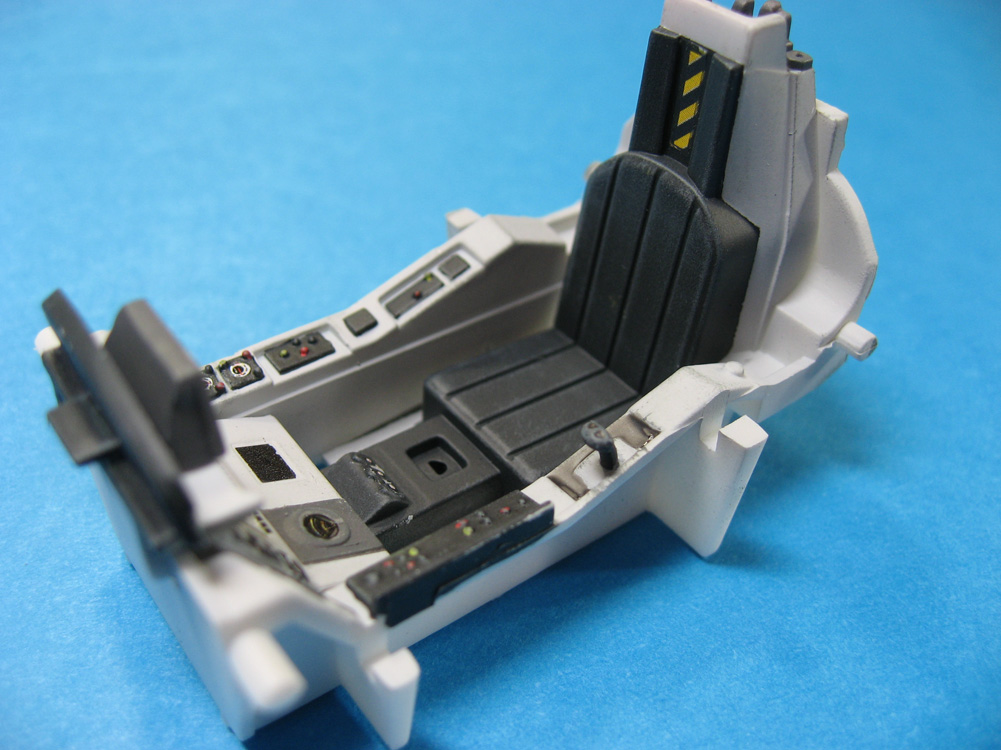
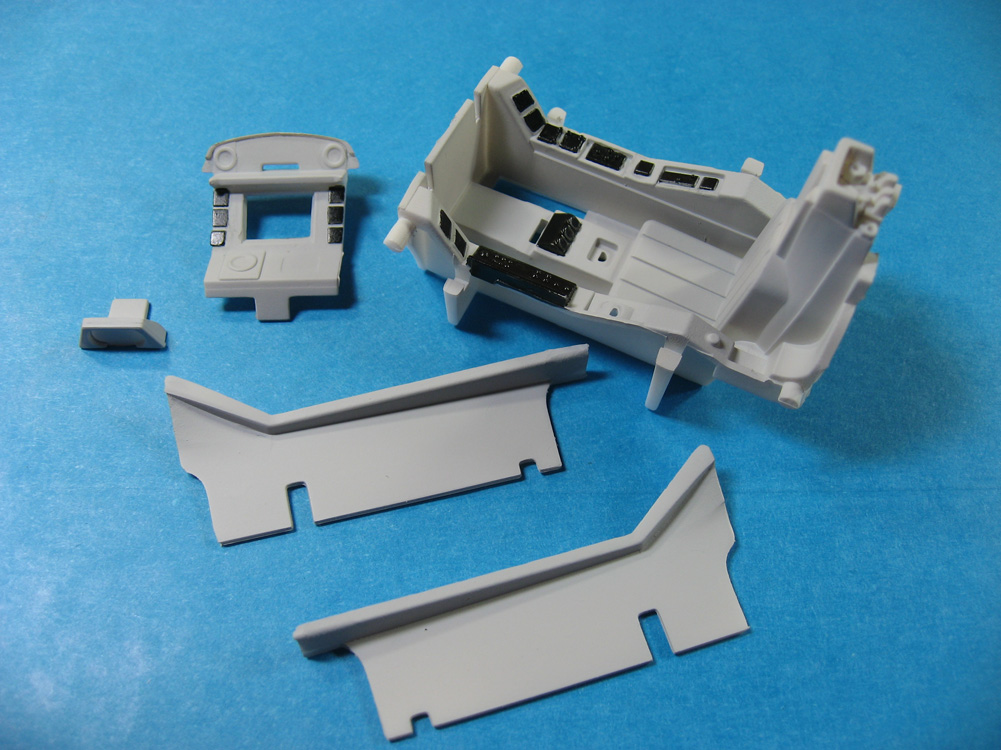
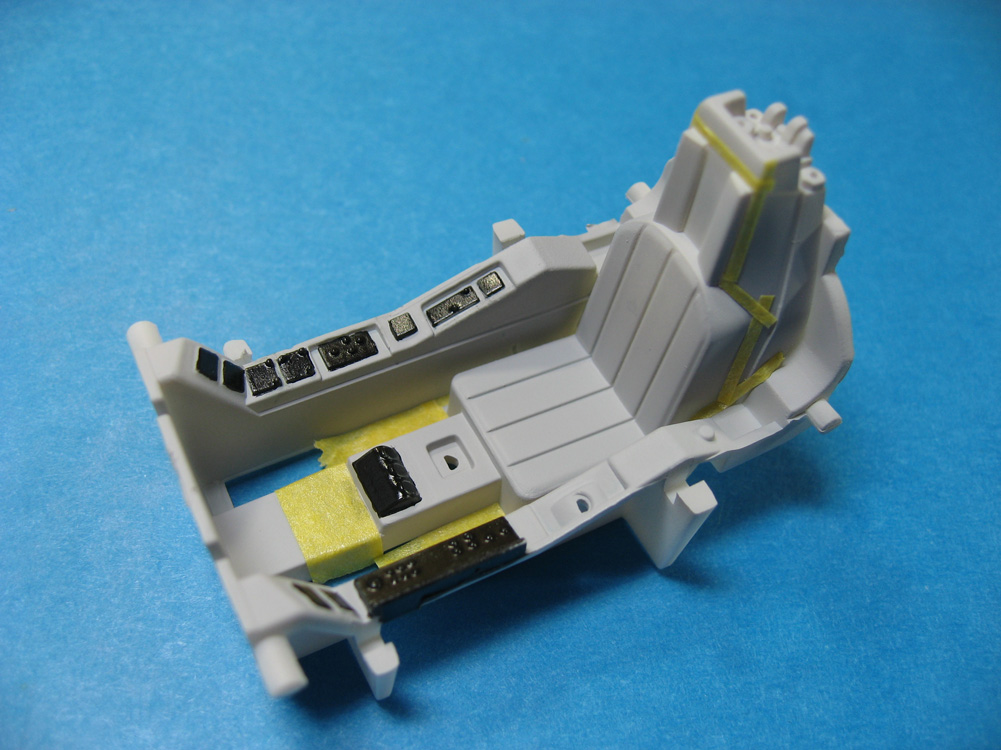
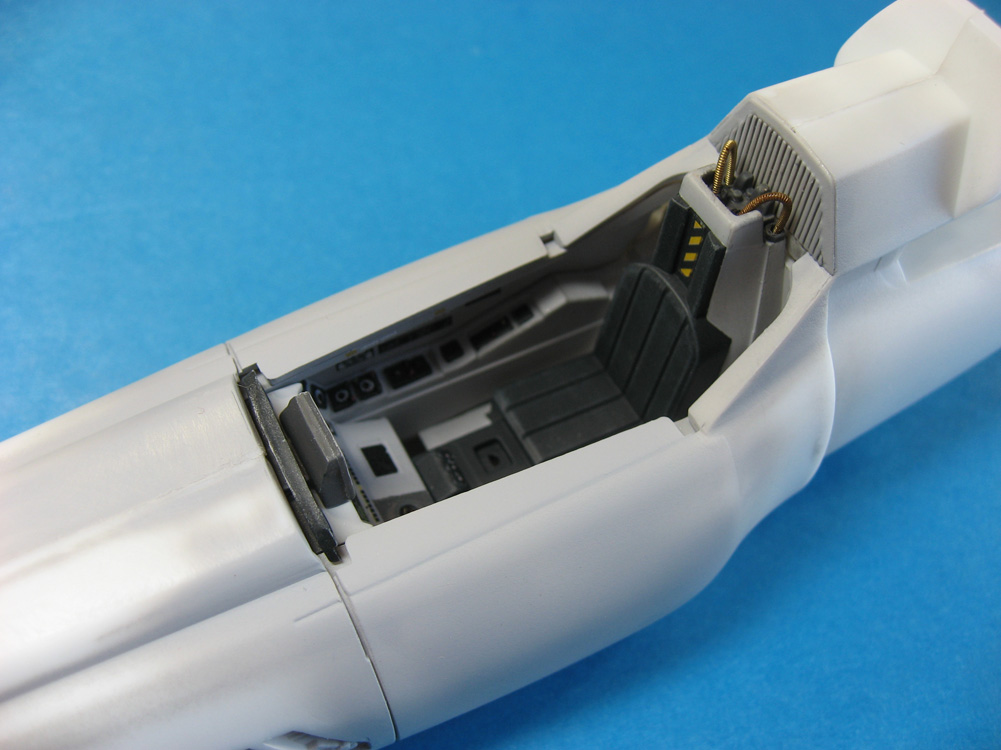
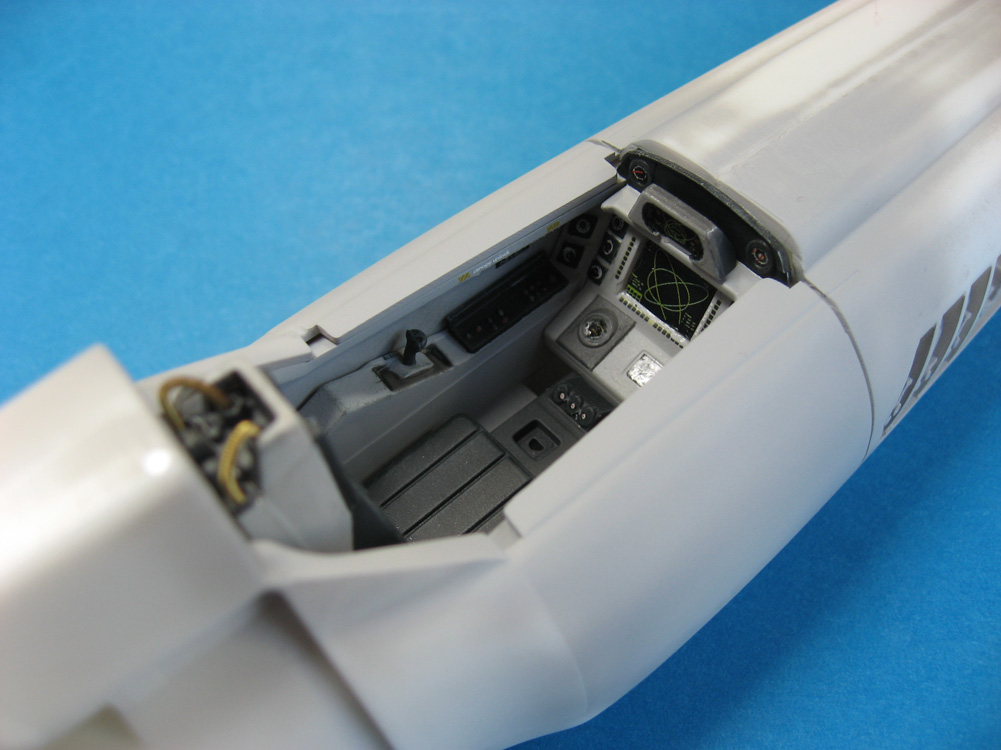
Since the cockpit gets sealed up inside the fuselage, I have to deal with it first.  The photos below show the process.  The five major components (2 sidewalls, tub with seat, instrument panel, and display) were cut out, cleaned up, and primed.  The sidewalls had HUGE ejector pin marks in prominent positions, so I filled and sanded, primed, repeated as necessary.  I then cut in and painted the black panels by hand, something I don’t normally do, but they were just too tiny to mask.

After that, I began to mask off the seat and the top of the instrument panel, both also to be in black.  The seat was tricky, and I wish it had been a separate assembly to ease the process, but you work with what you have. I started by “cutting in” the seat with extremely small 1mm tape.  Once that was completed I went around again using 5mm wide Tamiya masking tape and blue painters tape.  Once that was all set and the lines were clean where I needed them, everything else was covered with Silly Putty, and the paint sprayed.  The last two photos show the paint and masks after spraying, and then after all masking removed.

Time to mask the seat: 1 hours, 20 minutes.
Time to paint the seat: 2 minutes.
Time to remove all the masking: less than 2 minutes.