Hour of the Wolf Appearance

Recently the Altered Fluid writing group appeared on the Hour of the Wolf on WBAI.  This time it was I who was on the chopping block with a new short story.  The story, very tentatively titled, Number Thirty-Five, was a very rough draft.  I had considered turning in something that I’d worked a little bit more on, but I went ahead with the rough piece.  It turns out it was a good choice, as this time the show was a bit different as well.  We recorded the critiques at a meeting in September, and did the radio show 4 months later.  This allowed us to discuss the story as it was critiqued, and also gave us the chance to talk about some of the changes that have come about in edits.  Since recording the show i have continued to work on the story, inspired by the conversations that night, and hope to have it ready to submit to a market or two in the near future.

** EDIT **WordPress is being screwy with the link I posted.  Copy and past the below into your browser and it’ll bring up the MP3 of the show:

Viper: Stripes Added and Lightly Seasoned

The Viper model kit comes with an extensive decal sheet, which included all of the red striping that dominate this craft.  I, however, am using the Aztek Dummy masks.  In the first photo below you see the sheet the masks come from, with the odd angled pieces already removed – the black vinyl is the mask, the visible white is the backing.  The next photo shows it on top of the wing.  Those black strips/bars that connect the two sides of the mask are there to aid in placement.  After placement you take a straight-edge and a knife and cut them free.  In my opinion this causes a major problem, which is why I started by trying these out on the lower wing surfaces first.  By cutting the reinforcing strips out after putting them on the model, you are cutting a small groove into the wing’s surface.  Also, you have to be precise, very precise, to make sure that cut is exactly along the edge or you get a recess or protrusion in your straight-line mask.  I ran into issues with all of this, and while the result is okay, the cuts where I removed the reinforcements pulled paint into them causing artifacts in the finish (and I cut the reinforcements out with a brand new, super sharp, scalpel blade).  In the final photo of this set you can see the end result.  They look okay in the photo, but up close there’s too much inconsistency for my liking.  The large white chips in the red are intentional, more on how I do those in a moment.

I decided to skip the vinyl masks and go old-school on the nose stripes.  I made a color copy of the decal sheet, cut the stripes out, and tacked them onto the model with tape.  I then outlined the stripes with 6mm wide Tamiya tape for the upper stripe, and I used extra-fine 1mm wide Aizu brand tape to mask the curve around the nose.

Once the stripes were masked, I prepared a small dish of water and another dish of Kosher salt.  Kosher salt has much more random and natural crystals than table salt, which makes it better for this application.  Take a paint brush, put a single drop of water on the model where you want a chip.  Wipe the brush on a cloth until it’s nearly completely dry, then dip it into the salt and pick up a few crystals.  Put the salt on the drop of water on the model.  As the water evaporates the salt dissolves just enough to adhere to the paint.  Let it dry completely — usually only five or ten minutes — then spray your paint.  After you remove all of the masking, take a toothpick and gently knock the salt free.  Instant jagged paint chips.  I’m going very light with this effect on this model, but I do like the results so far.

For the red color I’m using Mr. Color #68 “Red Madder” and I’m not entirely sold on it’s accuracy.  It’s better than their #3 plain-ol’ “Red” in matching the decals, but it’s still a little bright for my tastes (and in the photos it’s much brighter than in person).  Nothing that some weathering won’t tone down, though.  For the stripes on the wing upper surfaces I’ll be skipping the pre-cut masks and just cut them in on my own with masking tape.  I hope to have that done by the end of next weekend.


Viper: More Masking

Okay, it’s probably boring as hell looking at all of the taping I’m doing.  This is more for me, anyway, so I can look back and see how nuts I was to do all of this.  More of the same as last post, making tape all over the place, Silly Putty and paper towels to seal it all off.  In this case, literally 3 hours and 15 minutes of masking, less than 5 minutes of painting, then 10 minutes to rip it all off.

Engine inset, thruster cans, and intake above the cockpit are all done in dark gray.  I used some Alcad metallic Magnesium to give some highlights to the thruster cans (can’t really see it in the photos) and to paint the inside of the nose opening.

I’m particularly proud and pleased with the third and sixth photos in the gallery below.  The full-scale filming model has this entire area in dark gray, but some of the CGI models and some smaller scale builds have it masked off as I’ve done.  The third photo shows the massive amount of masking, the sixth shows the result.  I couldn’t believe how well it turned out.

Viper: Masking Details

Now that all of the white is in, I decided to go with the avionics bays and engines for the next part of the process.  It’s a small and seemingly insignificant part of the project, but it takes a lot of work to get it painted.  Below are images showing the tedious process of masking.  The tape is at most 4mm wide, cut into even smaller strips so that they’ll fit where needed.  I’d say that each bay took me about 45 minutes to completely mask.  Then it was literally two minutes to spray the paint, and then another two minutes to remove the tape.

The end result is very clean and worth the effort, but the color is a bit dark to my eye.  I’m going to leave it as-is until the engines are done and the stripes and guns are added.  If they still look too dark then, I’ll lighten them with some light gray glazes and washes.

Viper: White Paint

Vipers are white, which poses a special problem in that white is one of the absolute worst colors to have to work with.  Some will say it’s replicating a bare metal finish that’s the most difficult, but I’d rather paint a dozen aluminum and tin and steel clad aircraft than just one in white.

I started off the process by covering the already painted engine intakes with Silly Putty.  Then it was time to mix up the paint.  Here I’m using the lacquer based Mr. Color gloss white.  I prefer acrylics for most everything except priming, but since white is so troublesome, I wanted something that would dry fast and stick like glue immediately; acrylics dry fast but can sometimes take days until they’re ready to sand/feather or mask over.   The obvious issue with lacquer as opposed to acrylics is that they are about as toxic as standing water in an abandoned Jersey City lot, but they do spray and work beautifully.

I did an initial coat of the stuff that I’d thinned a bit too much.  It went on translucent, so I made the best of it and got as much coverage as I could.  There were a few imperfections that I’d missed, and the ever-present dust particles that stick in the paint no matter how well I clean the area, that I had to take care of.  Fortunately the paint was dry enough to sand in a couple of hours.

The next painting session went better, and I’ve got a good overall coat of white now.  There are a few places where dust needs to be polished out, and a spot of rough paint below the canopy where the surface is grainy — from not getting a wet enough application — but I’m hoping that I can work these areas and not get back down to primer and need to spray them again.  If that’s the case then the next stop is either masking and spraying the red stripes, or making the engines and other bays for dark gray paint.  I haven’t decided which to do next.

The end is (almost!) in sight.

The Gettysburg Address and My Ring

I’d never really thought about wedding rings much before.  But, after getting engaged, it dawned on me that I might need one.  Tradition and all that.  I’ve had friends that had custom made items that look like the One Ring from “The Lord of the Rings” books, friends who wear family heirlooms, and others who have bought antique jewelry to suit their purposes.  I came to realize fairly quickly that I wanted something historical to wear, something with some time behind it.  I’ve always been interested in what once-was, and at the time of my shopping for a ring, I was well into my research period for a Civil War novel.  I’d been spending a lot of time in Gettysburg.

148 years ago this past Saturday, Abraham Lincoln delivered the Gettysburg Address to officially dedicate the Soldier’s National Cemetery in Gettysburg, PA, four months after the famous battle of 1863.  The speech is noteworthy both for its historical significance, as well as its literary importance; very rarely have so few words said so much.

Edward Everett was the first to speak at the dedication and spoke for nearly two hours, and so, when Lincoln then stood to deliver his address, the photographers were prepared for another long presentation.  They were caught off guard when Lincoln delivered his under-three hundred work piece in mere minutes.  As such, there is only one known photo of Lincoln during the ceremony, shown below.  Lincoln is highlighted in the very center, just sitting down after speaking.

My interest in the photo and the speech, for this post, though, is not on Lincoln.  See the small tree in the background of the photo?  That tree still stands in the cemetery in Gettysburg.  In 2008 a storm brought down a large portion of it (it still survives, though, and is even showing new growth), and I was able to acquire part of it (Thanks, Bill!).  Through a friend’s recommendation, I found Minter & Richter Designs on Etsy.  A few emails were exchanged, I sent them the wood sample, and after various discussions and a few weeks time, they delivered my bronze-sheathed ring, with an inlay of wood from that tree that watched Lincoln speak 148 years.

The ring has developed a nice patina since the above photo was taken, and the bronze blends very well with the wood inlay.  I’ve since moved on to other projects and and haven’t had the time to visit Gettysburg for the past two years, but it is nice to carry with me a piece of such a momentous historical event.  Oh, and it’s nice to be married, too.


Viper: Canopy and primer

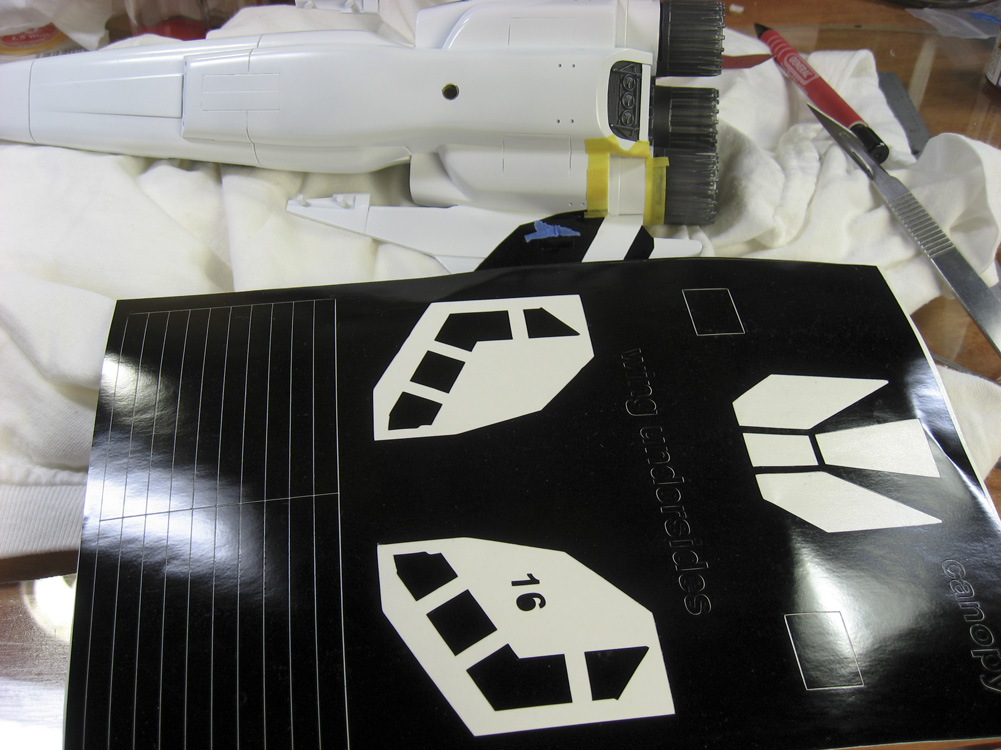
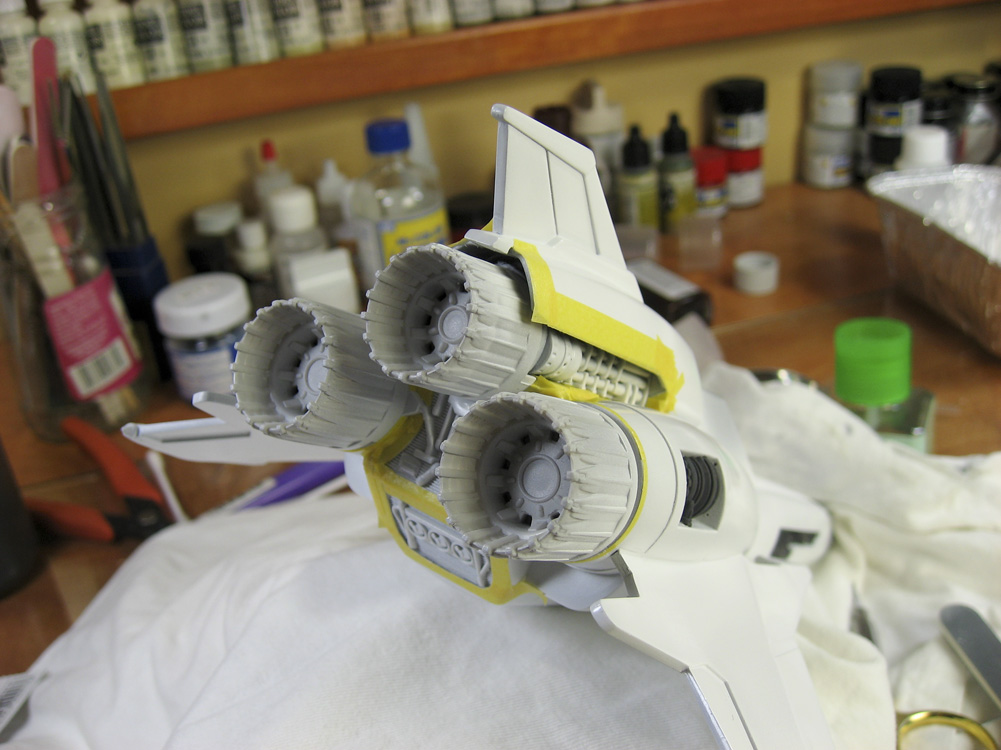
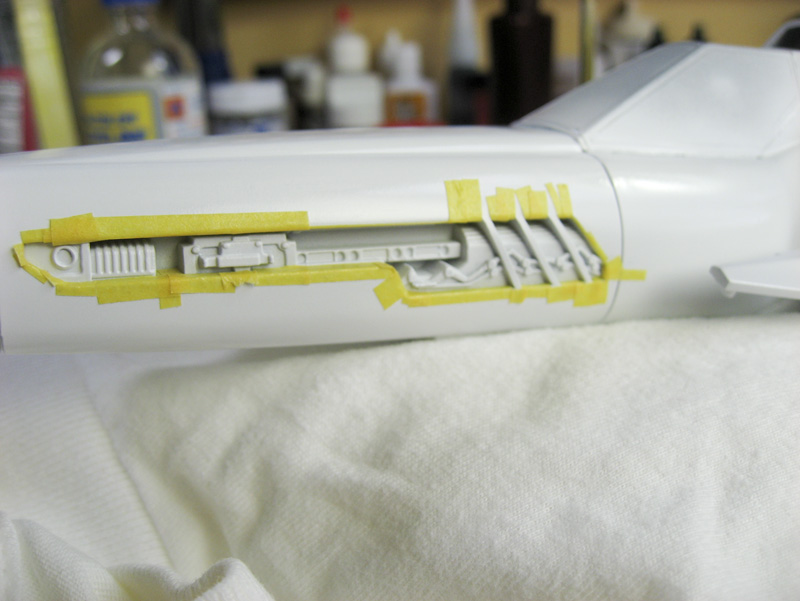
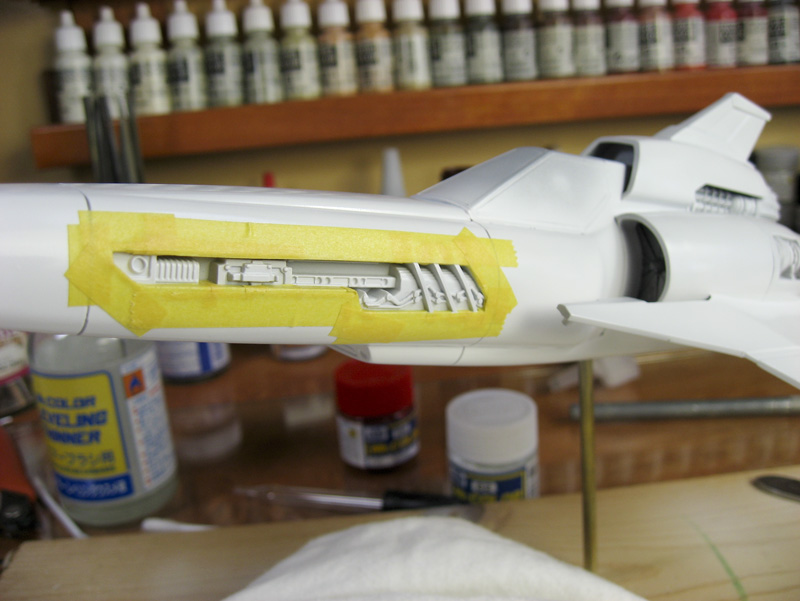
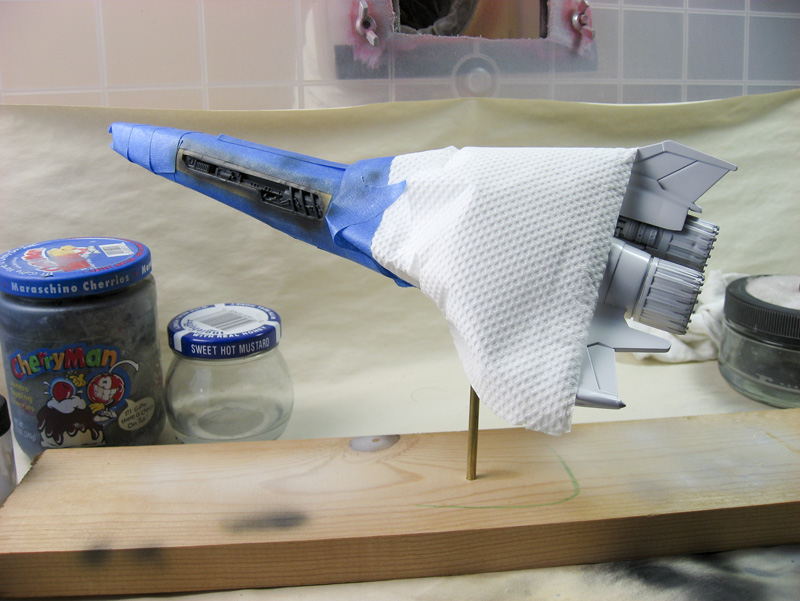
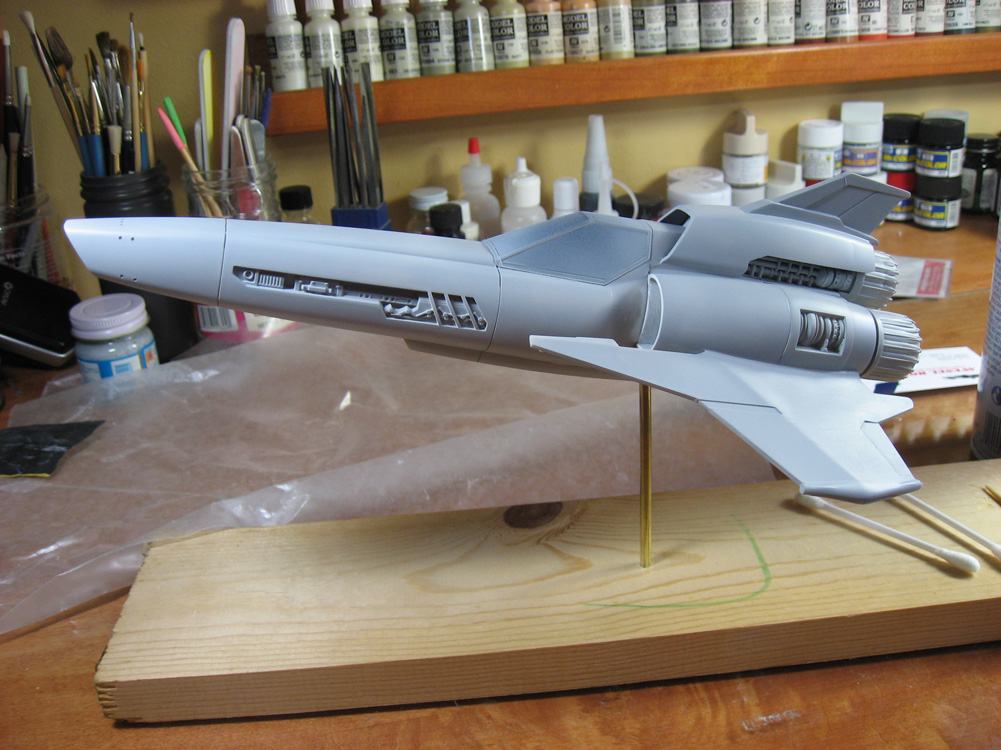
Starting to get close to paint time!  One of the last major components to go on was the canopy (the guns are all that are left to go on, but they will be the last thing done, after final painting and weathering are finished).  The canopy had some fit issues.  The instrument panel sat a bit proud of the cockpit sill in the front, keeping the canopy from sitting level.  After several sessions with a super fine file and attention to the top of the panel, I was able to get the canopy flush.  Just to make sure it was all snugged up, while the glue set up, I clamped it from the top, but very carefully.  Clear styrene is much more brittle than the other varieties, and the last thing I wanted to do was crack this transparency.

The black vinyl masks are from Aztek Dummy and specifically for this kit; the set also includes masks for painting the red stripes and markings, which I’ll do instead of using the kit decals.  They pulled from the backing fine and laid down pretty well.  I had to do some burnishing around the inner canopy frames to get them to completely adhere.

The final photo is of the Viper in overall primer gray.  There are a few spots that need touched-up and polished out, and once that’s done it’s time for a little pre-shading and then the overall white coat.

World Fantasy 2011

Last weekend saw the yearly World Fantasy Convention, this year in sunny San Diego, for four days of panels, readings, parties, and all of the other associated activities.

As has been the case for prior years, I only attended a few readings, mostly those of fellow Altered Fluid members, and only one panel.  The panel attendance was somewhat mandatory, as I was one of its five members, the others being Shelly Rae Clift, Dennis McKiernan, Heather Tomlinson, and Harry Turtledove.  The panel topic was “The Realities of Sailing”, as they pertain to fiction.  We discussed what details writers get right and wrong, and how much detail an author should go into; life on a ship in regards to available space on board; how weather impacts everything on the sea; and the uses of ships throughout history and in speculative fiction. I was the panel’s sole modern Navy veteran, and I was glad to have a unique perspective to add to the other member’s input.  Overall the panel was well attended and I had several people approach me afterwards to say that it was most helpful, which was extremely gratifying.

The rest of the weekend was spent at a few readings, and then the great parties thrown by the Australian contingent, SFWA, TOR Publishing, N. K. Jemisin’s cool book release party (really, how often do you get served mixed-drinks in sippy cups?), and several others that I can’t recall right now.

World Fantasy has always been a great place to meet new people and to catch up with old friends, and this one was no exception.  The fantastic weather and outdoor settings that we usually don’t get to enjoy added to the experience, and overall it was one of the better conventions I’ve attended.  I look forward to the next convention in Toronto next year.

Photo by Paul Berger.  L to R: Me, Dennis McKiernan, Heather Tomlinson, Harry Turtledove. Shelly Rae Clift is just out of frame to the left.

Viper: Cockpit, Again.

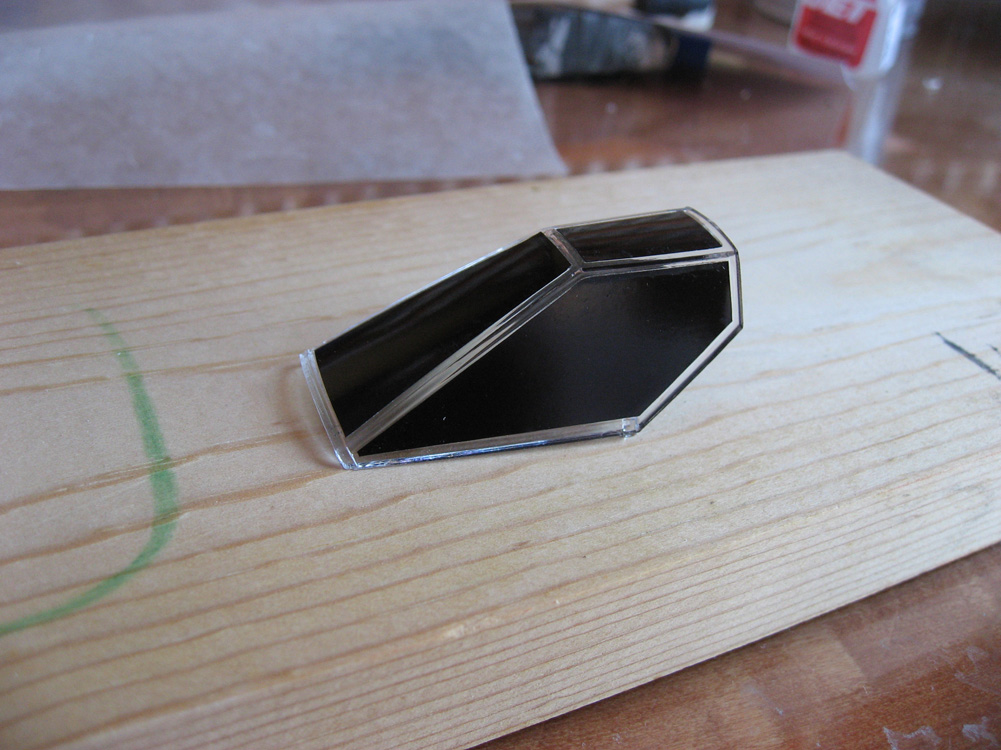
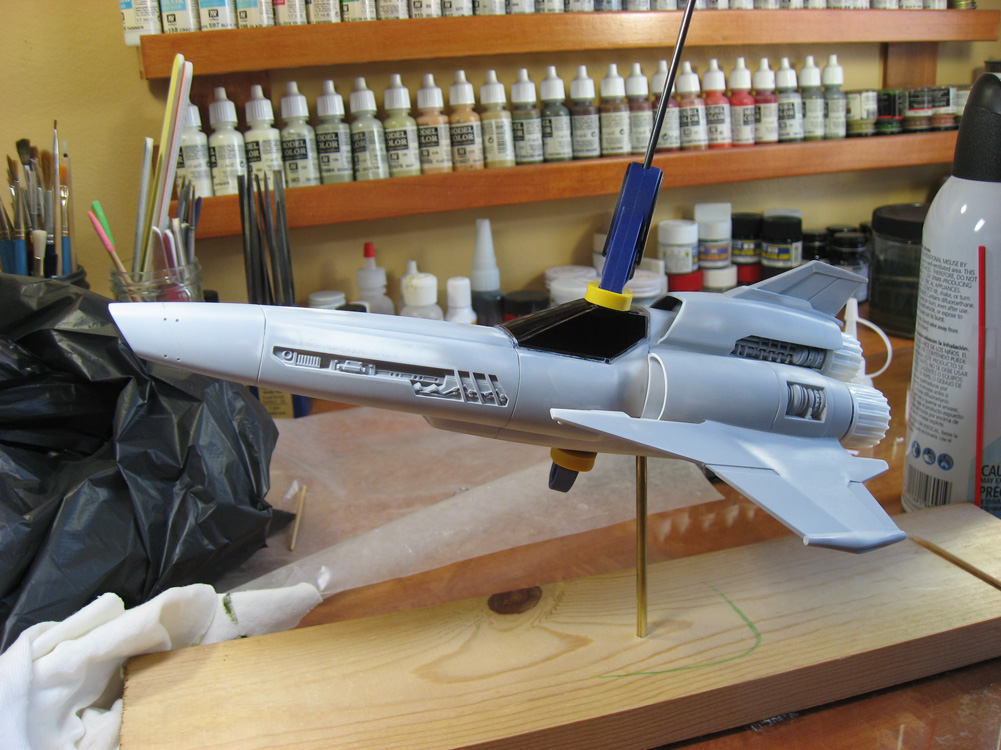
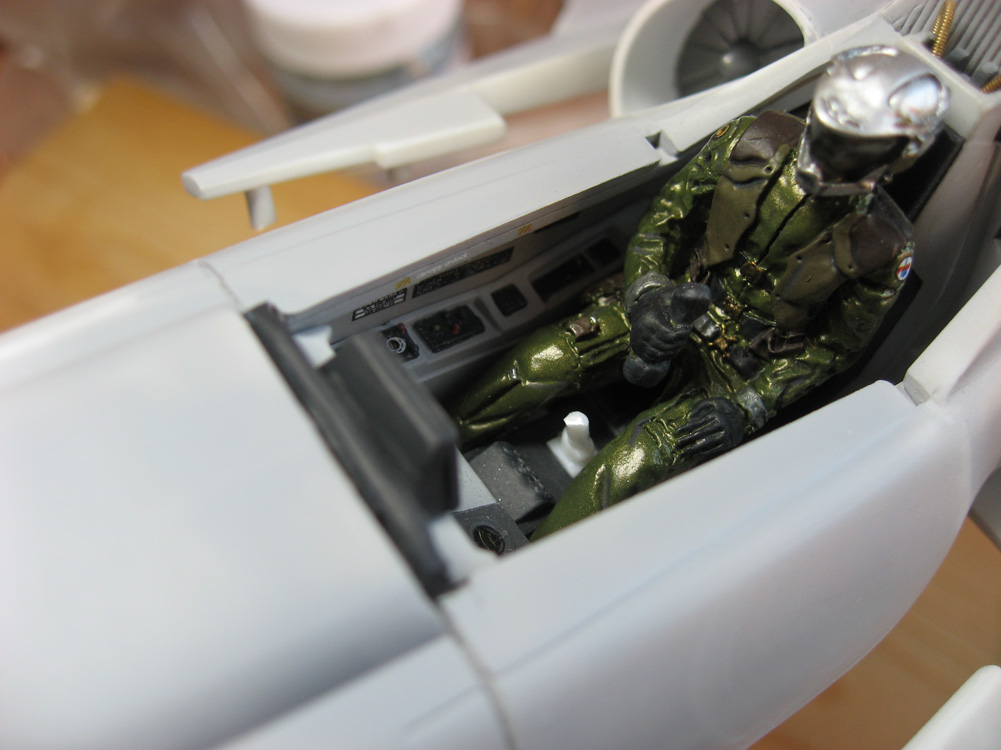
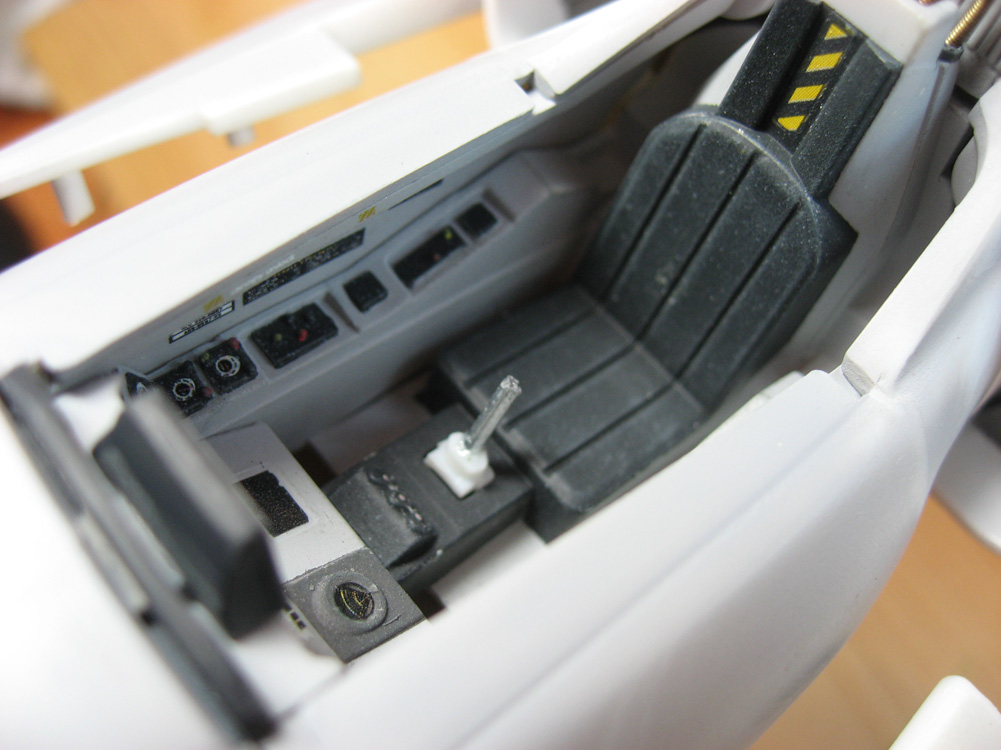
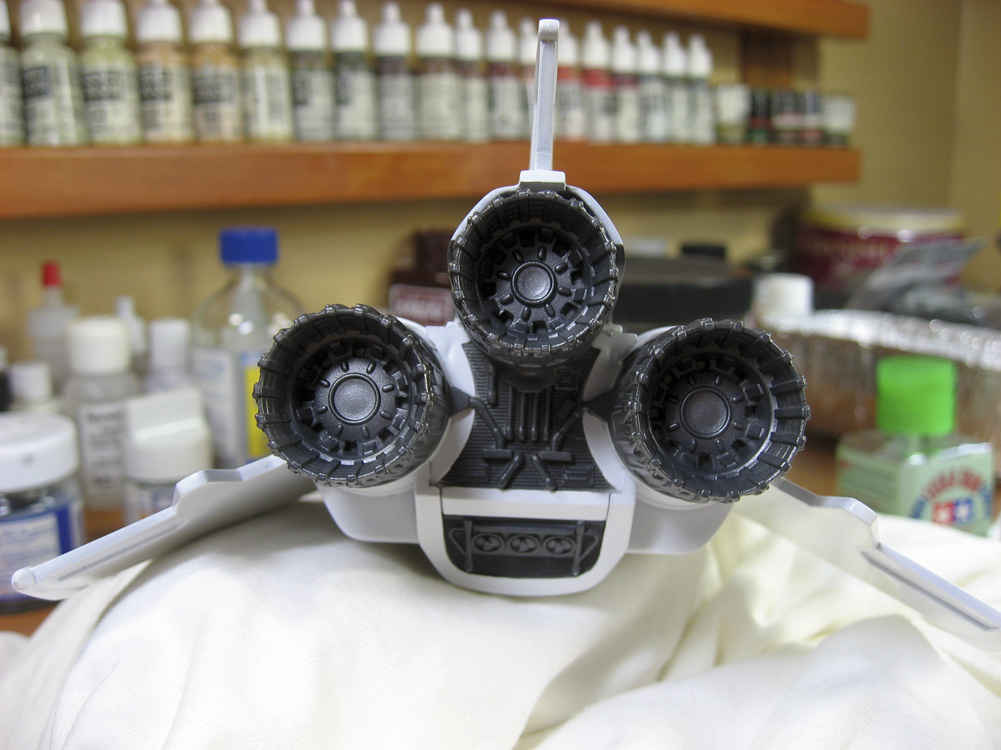
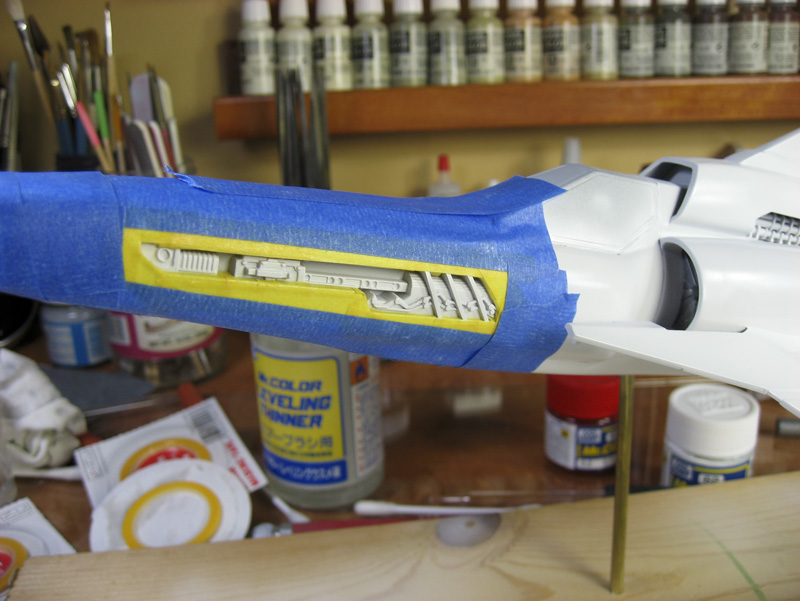
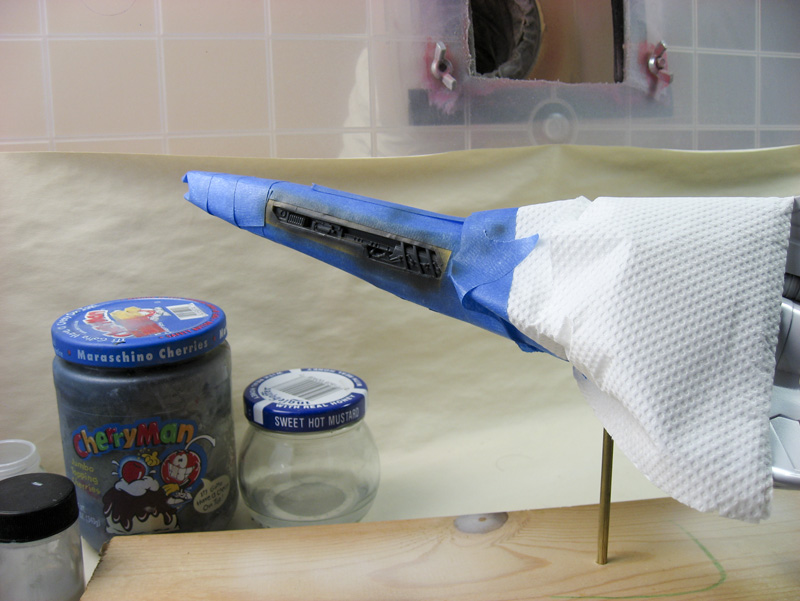
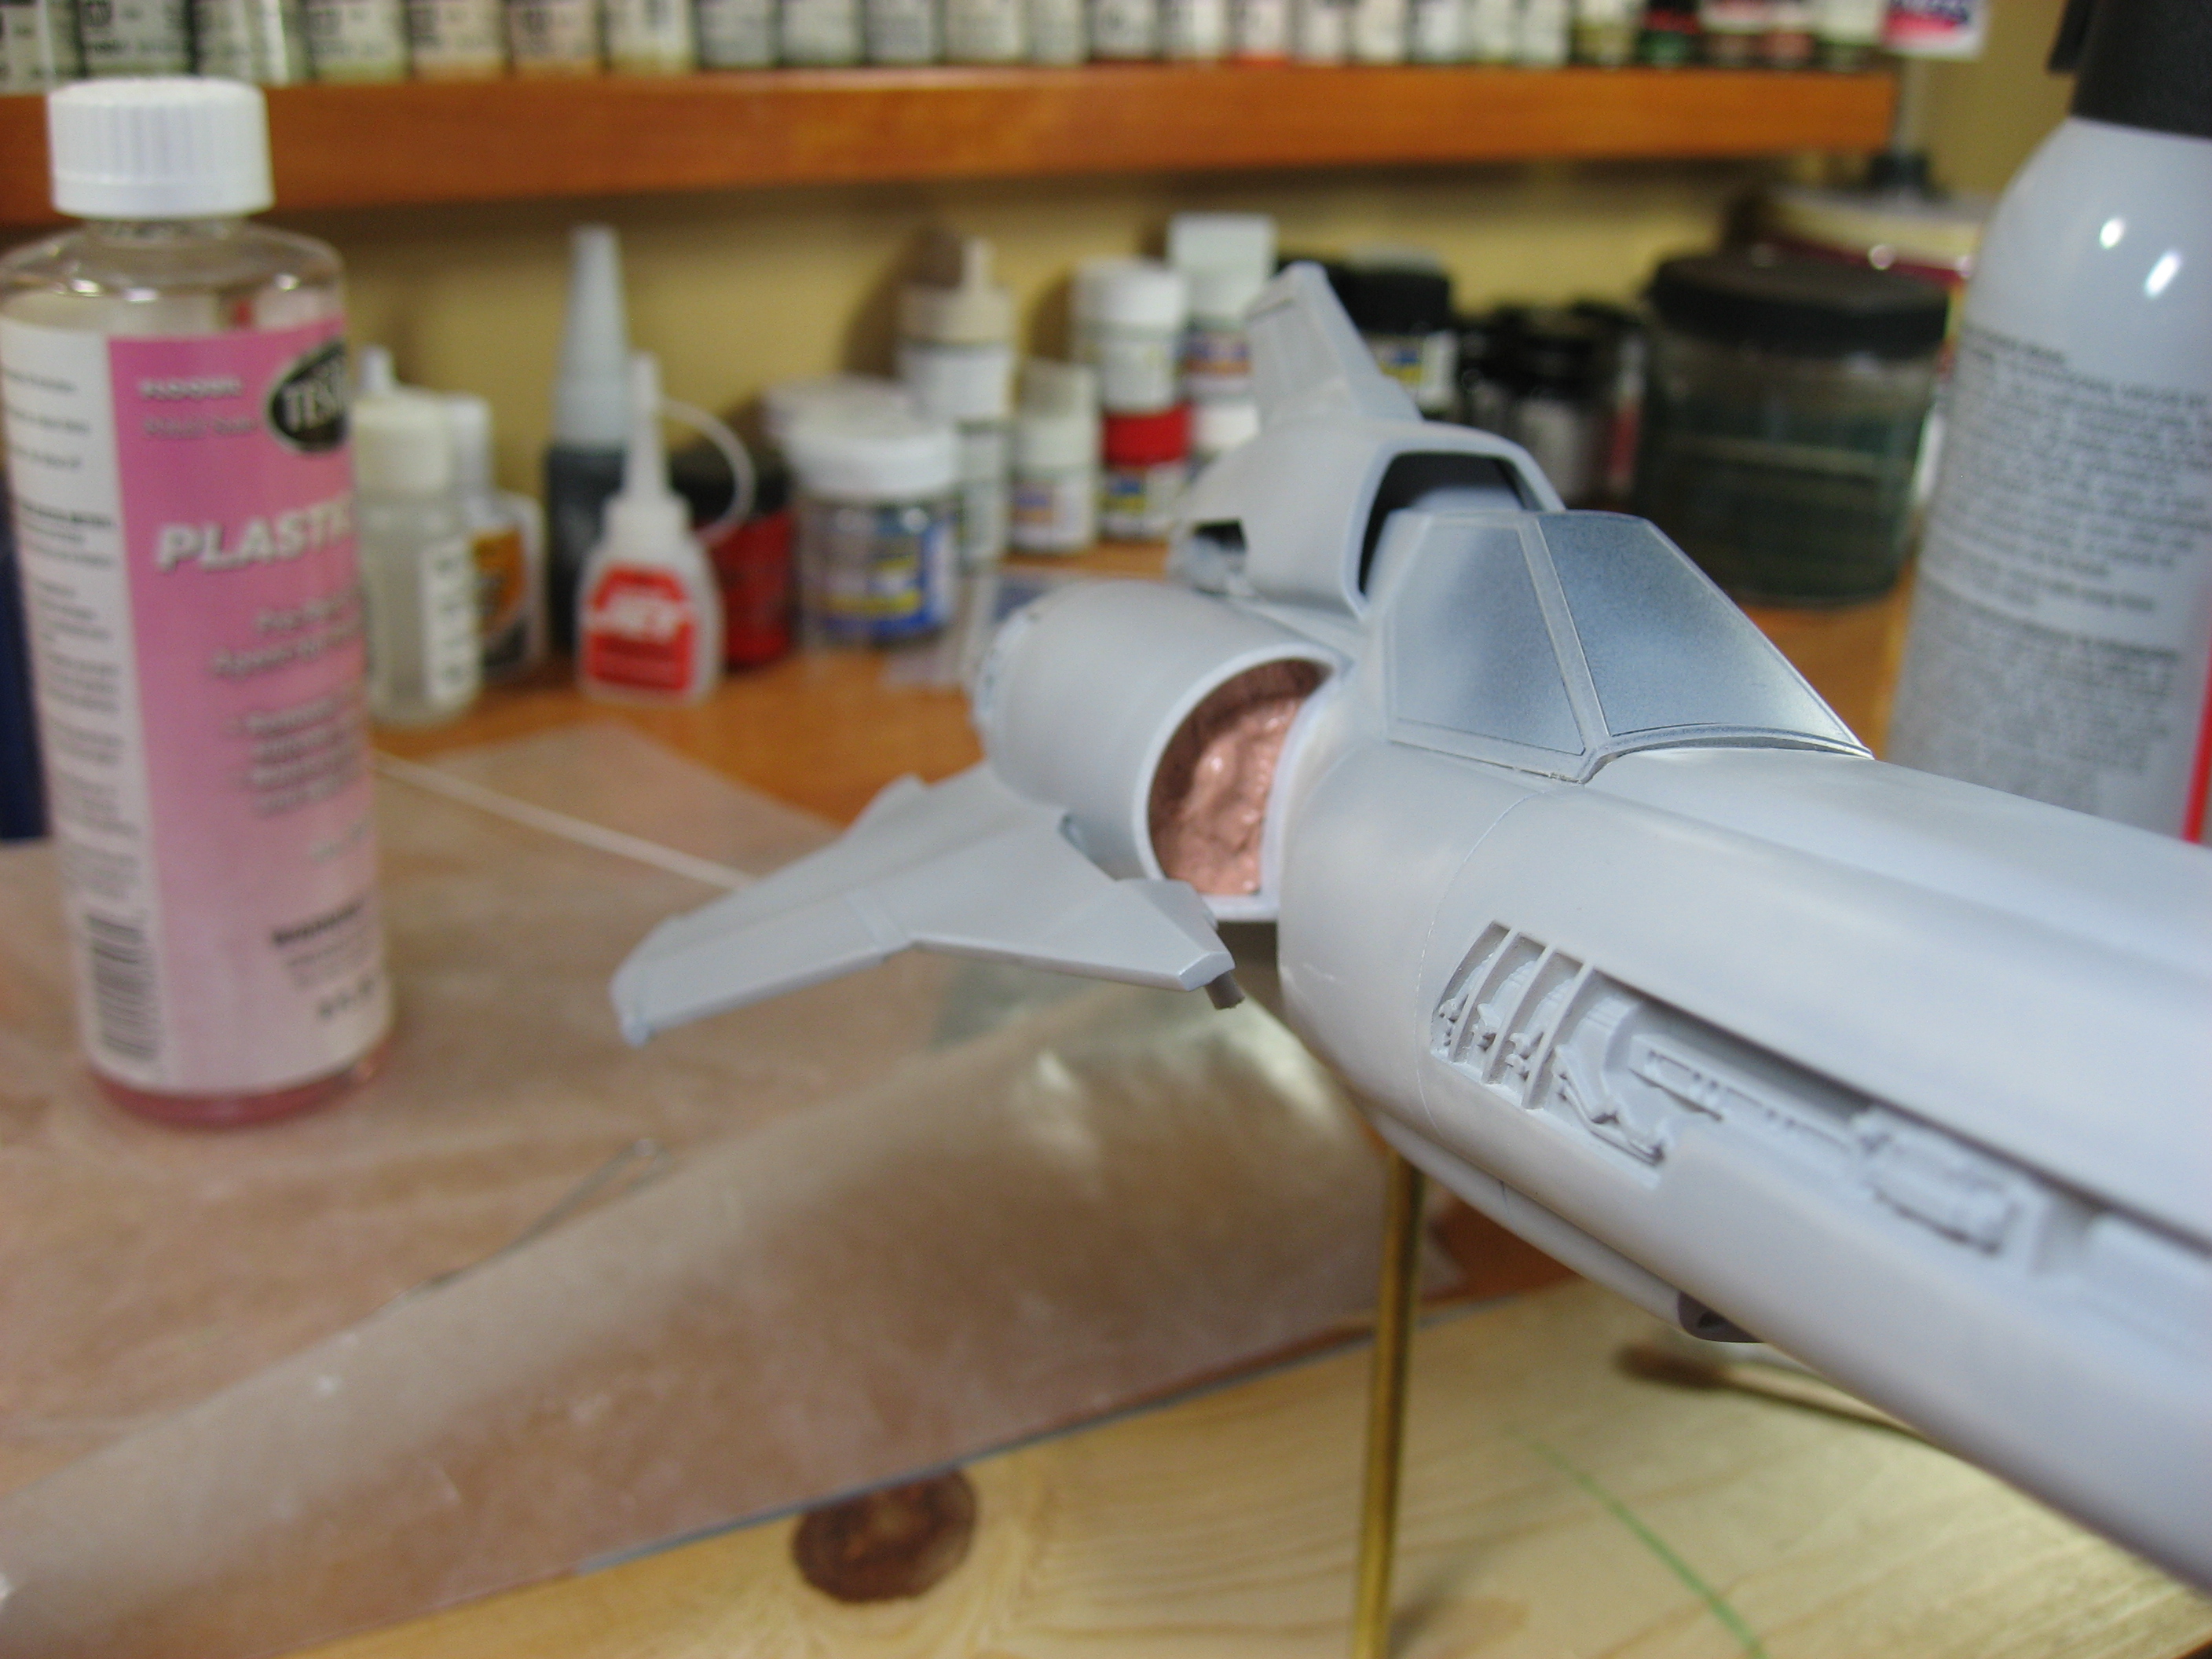
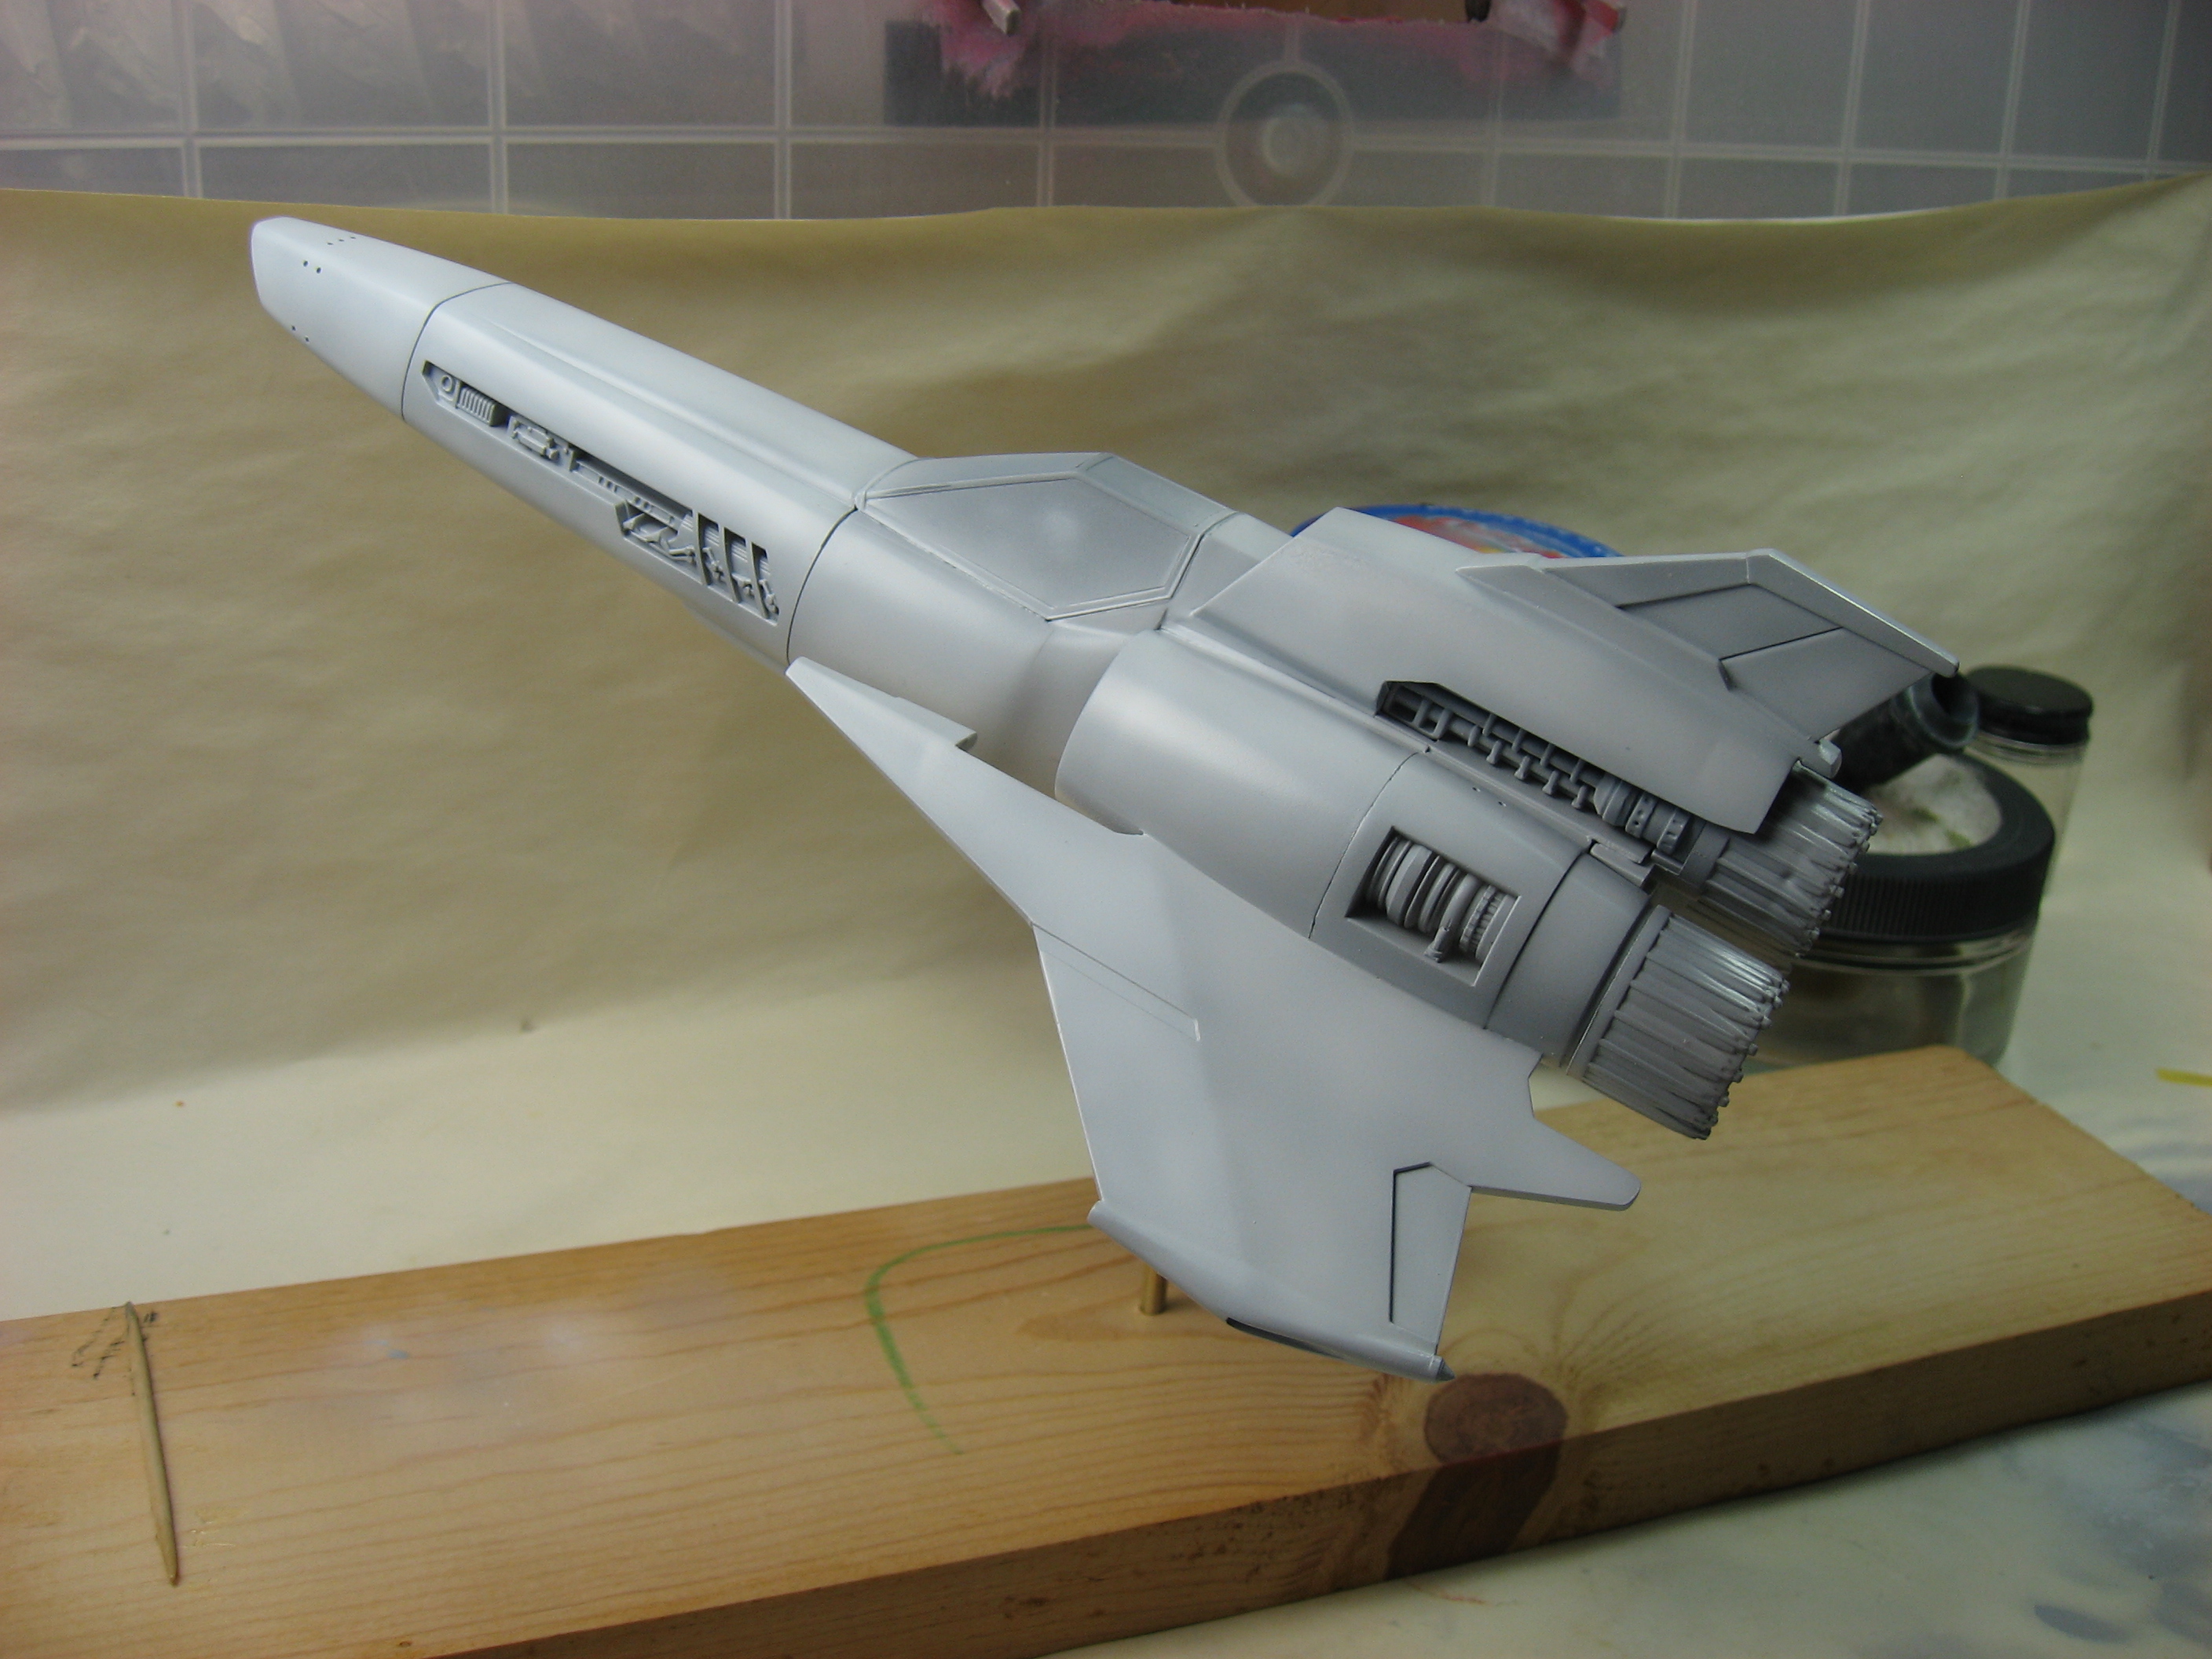
I’m reasonably sure that the fuselage is now ready for final primer and paint.  That means that I have to get the canopy on and smoothed into the fuselage (it has gaps, of course), and to do that our pilot has to go in first.  The kit instructions say if using the pilot, you are to cut off the top of the control stick and glue that to the bottom of the control stick already molded into the pilot’s hand.  As you can see from the first photo, they don’t even come close to meeting up.  Had I known of this issue before putting the cockpit into the fuselage, I would have built up the center console so that it looked right, but at this stage all I could do was drill out the base of the stick and put in a piece of wire to make up the difference.

The pilot didn’t quite want to fit.  Wide hips, narrow seat.  With a little pressure, though, it worked.   I broke out the super glue, a bar clamp, and repeated over and over as I tightened the clamp “please don’t snap his neck, please don’t snap his neck…”

The final piece is a custom tool I made for the build.  1mm square styrene stock with strips of 200 grit sandpaper glued to it.  For the small recesses at the top of the engines and around the seat of the thrusters, this is all that would fit in there.

Next up: put on the canopy and start masking for primer and paint.