After finishing the Viper last week and another ship that I’ll post photos of this coming week, I wanted to start something that I could build as quick as possible. I’ve had this Tamiya 1/48th scale F4U-1 Corsair sitting in the on-deck circle of the kit storage shelf for years. The kit’s reputation is that one can open the box, put in some glue, shake said box, and out pops a built model. Just what I need to cleanse my palette and get ready for whatever’s next.
Besides a quick fun build, there are two other reasons I chose this kit to build now. One is that the Corsair has been my favorite aircraft since I was a child. With my father being a pilot and into warbirds since I can remember, he and I skipped the usual “my sports team is better than your sports team” discussion that most fathers and sons have, and instead we hotly debated which was better: the Corsair, or the P-51 Mustang (his favorite).
The second reason I started the build is for practice. I’ve been putting off building my favorite models for a decade now, because I wanted to get better so that I could do them justice. I’m not getting any younger. It’s time to build (and do) what I love and stop with the putting off of things. The Corsair is the first, next will be the aircraft of USS Yorktown’s airgroup: the F4F Wildcat, the SBD Dauntless, and the TBD Devastator. I’ll be using the same build procedures, tools, and paint colors on the Corsair as I’ll need for those other aircraft. And I guess there’s also the reason that I haven’t built a U-Bird since I was in junior high. It’s time.
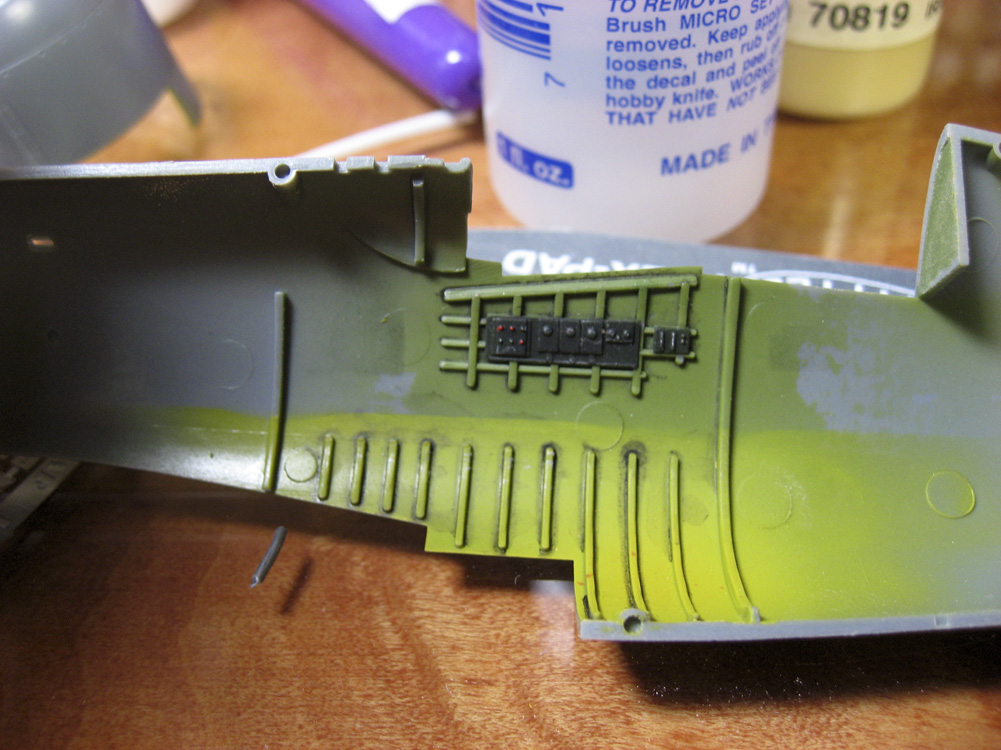
I started this build last Sunday, April 7th, at 6 p.m. The first photo (at the top of the post) showing the parts still on the sprue was taken four hours later. I’ve airbrushed all of the interior components either interior green, zinc chromate yellow primer, or salmon primer, depending on what they called for. One could honestly shoot everything interior green and be done with it, but I wanted to play around with different colors, and these are still all historically accurate.
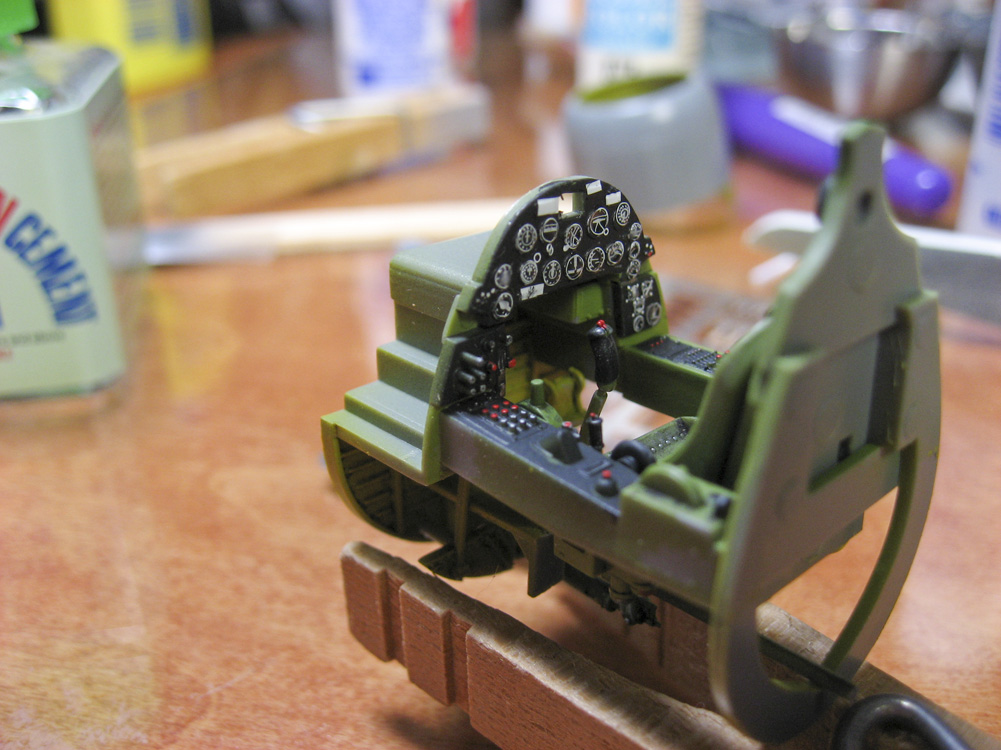
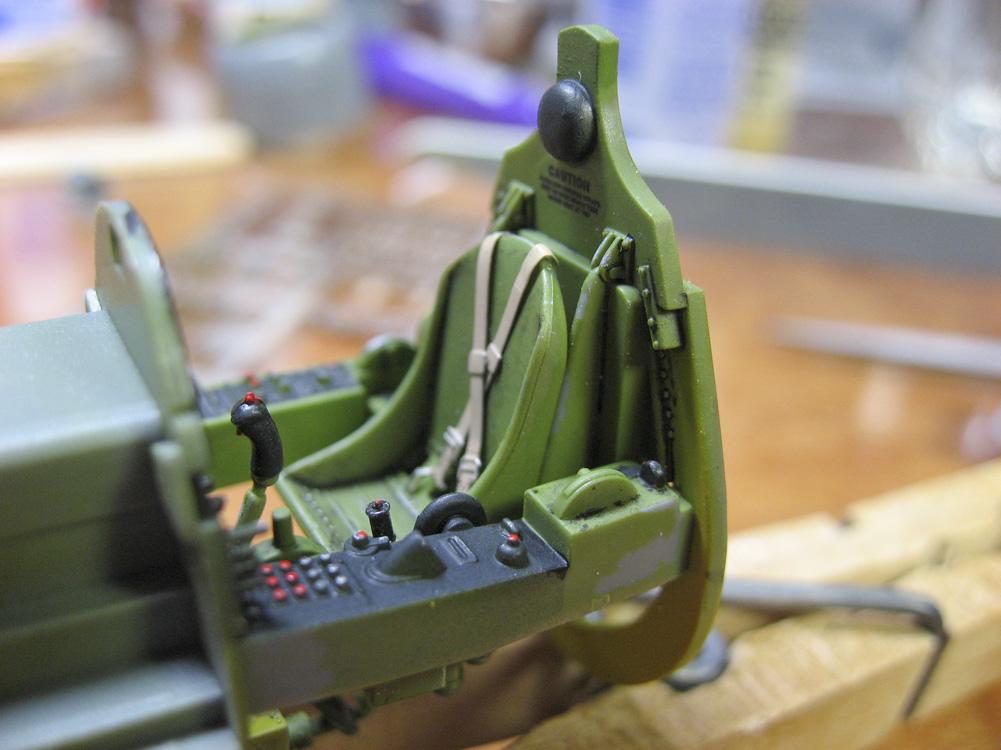
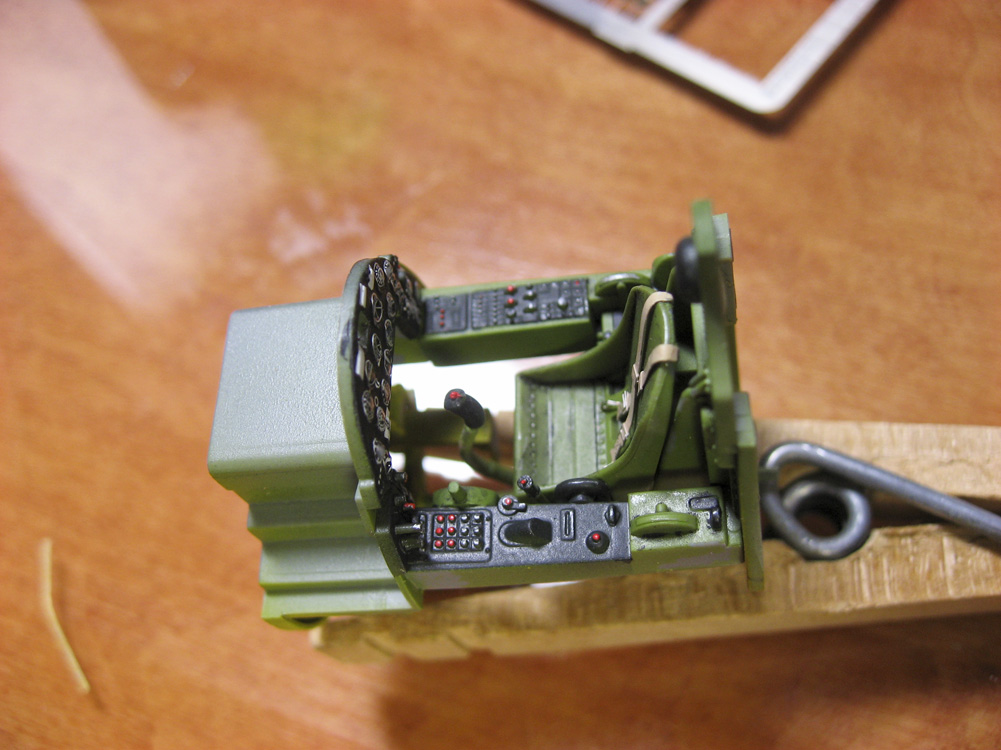
The cockpit went together really fast. The only issue I had was that I skipped priming everything to save time, and I’m using acrylic paints, so when I masked off for the black consoles, removing the tape pulled up some of the green paint and I had to retouch. The seat harnesses are leftovers from a photo etched set I bought years ago. I did a quick wash of black and brown oil paints cut with lighter fluid, so it would dry fast, and it looks okay, but I’m not thrilled with the grain of the paint and I’ll be looking for something that will dry with a less coarse texture.
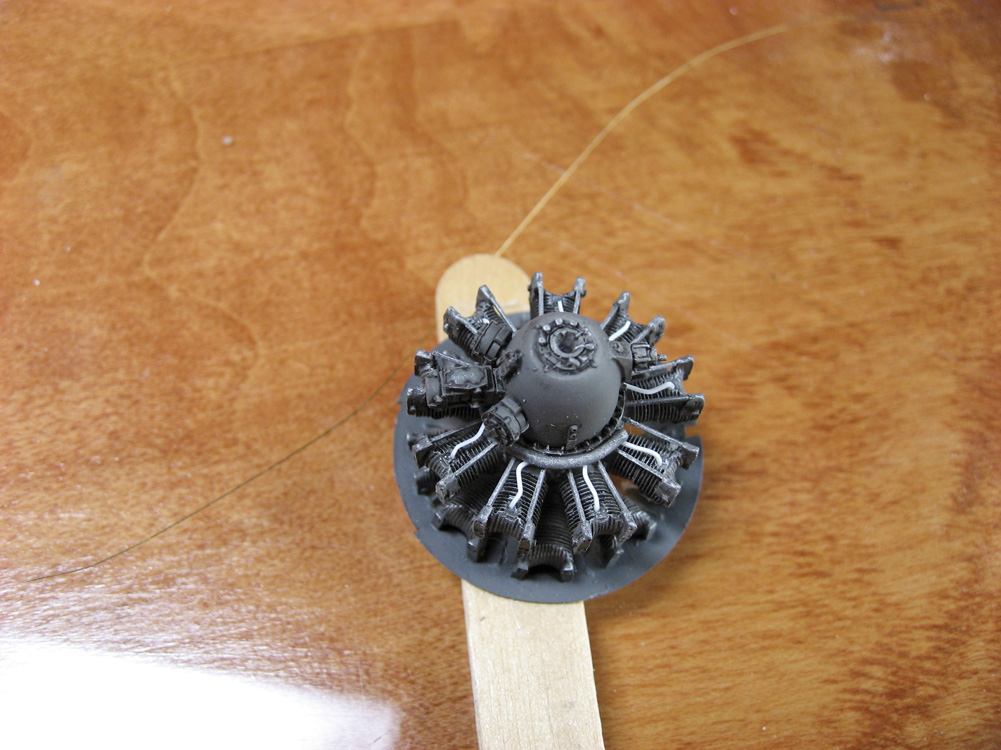
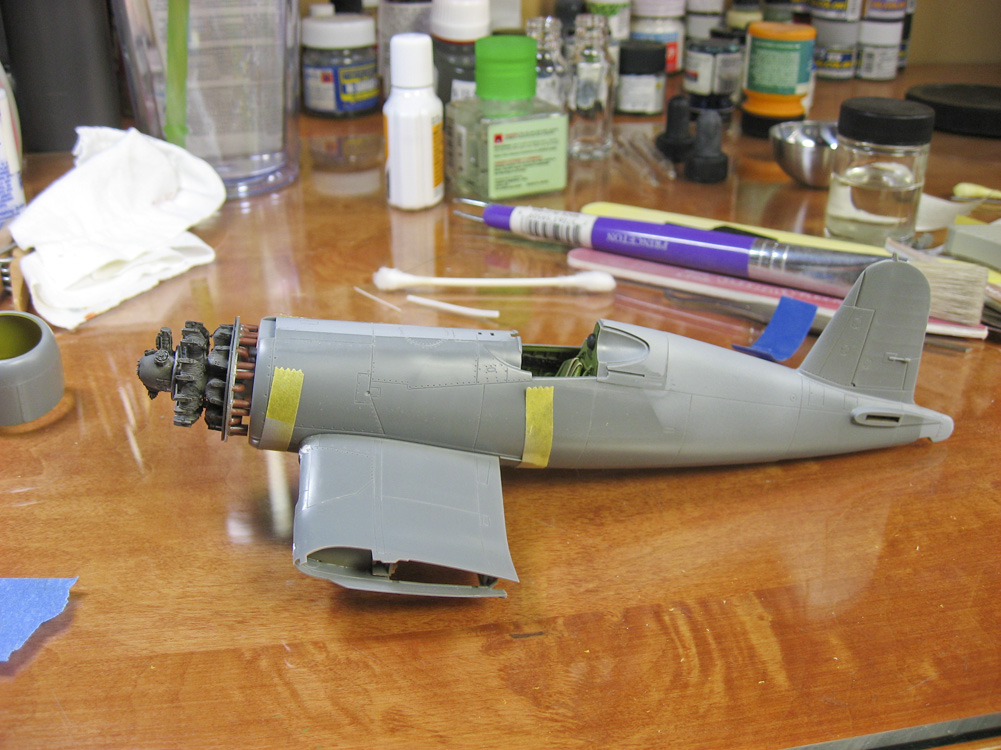
As of today I’ve finished the engine, which is a Quickboost resin aftermarket upgrade that I found in the kit box — I must have bought it at the same time I did the model — to which I added push rods, a wiring harness, and spark-plug wires (the as-yet unpainted white items). The last photo I shot fifteen minutes ago. The engine is not yet glued on, and the tape is holding on the lower wing assembly as it dries, but the fuselage is all glued together, and filling and sanding of some small gaps done. By this time next week I hope to have it all together and primed, ready for paint. My goal is to have this be a “less than three week” model.